Create a facial recognition system to unlock a door using a Raspberry Pi, webcam, and computer vision.
Whether you're securing a home, office, or secret lair, this project shows you how to build a smart access control system powered by facial recognition and Viam.
What You'll Build
- A facial identification system that unlocks a door when it recognizes an authorized person
Prerequisites
- A computer with MacOS, Windows, or Linux to flash your Raspberry Pi and configure the device's components using the Viam app
- Hardware and supplies requirements
- 1 - Raspberry Pi 4
- 1 - microSD card to use with your Pi
- 1 - power supply for your Pi
- 1 - USB webcam
- 1 - Digital Servo - to move an arm that triggers an existing PIR sensor
- 1 - Heated pad - to trigger an existing PIR sensor that also requires both motion and heat to activate the sensor
- 1 - Assortment of jumper wires
What You'll Learn
- How to configure and test a device's components using Viam
- How to use a vision service for image classification
- How to connect vision events to physical actions (like unlocking a door)
- How to integrate a Raspberry Pi, camera, and actuator for access control
What You'll Need
- All the hardware components listed in prerequisites.
- Sign up for a free Viam account, and then sign in to the Viam app
Watch the Video
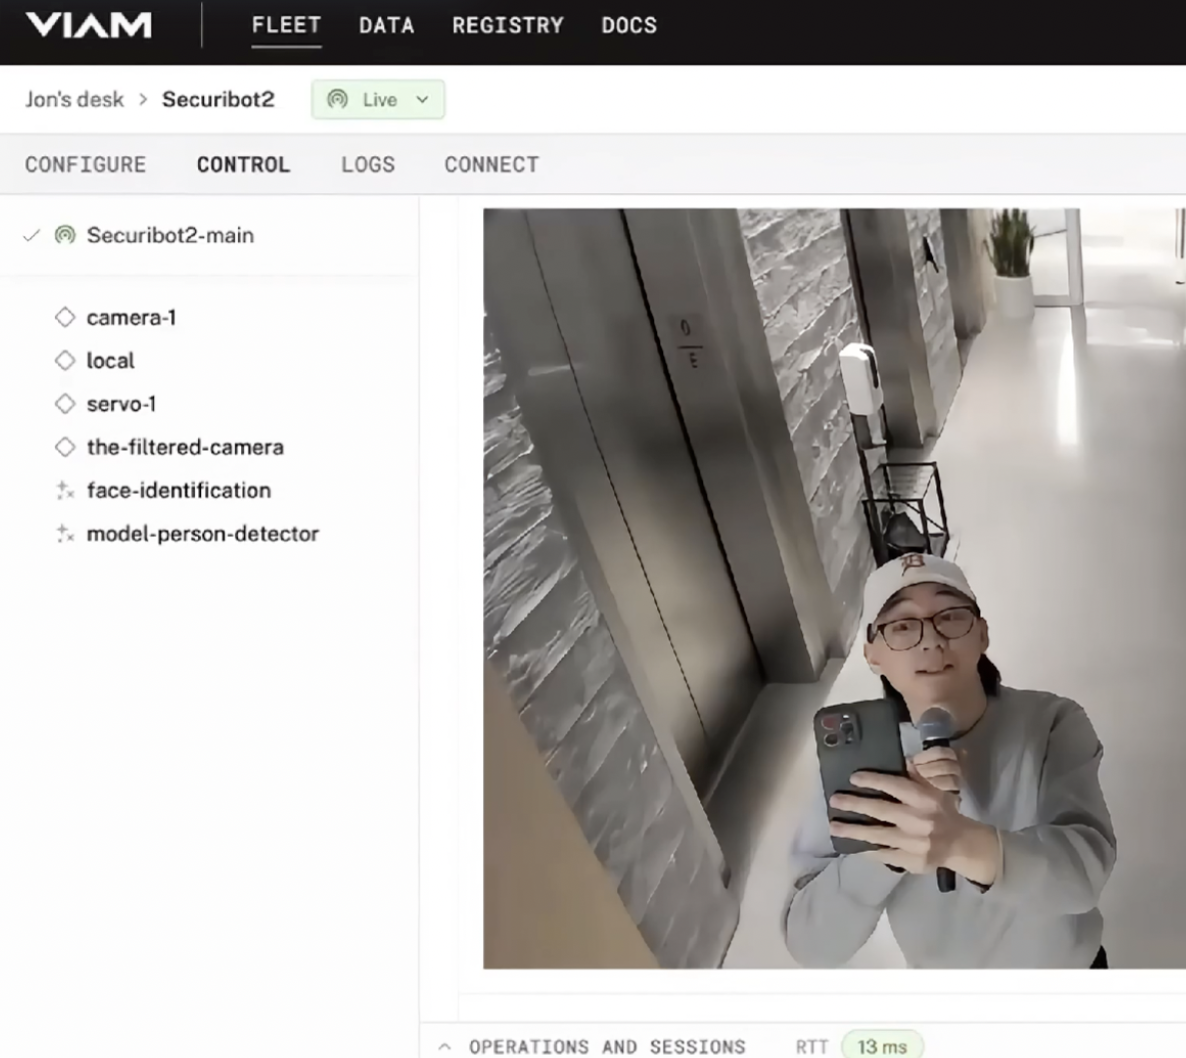
See a demonstration of the "Securibot", the door access system, in action:
The Raspberry Pi boots from a USB flash drive (or microSD card). You need to install Raspberry Pi OS on a storage device that you will use with your Pi. For more details about alternative methods of setting up your Raspberry Pi, refer to the Viam docs.
Install Raspberry Pi OS
- Connect the USB flash drive (or microSD card) to your computer.
- Download the Raspberry Pi Imager and launch it.
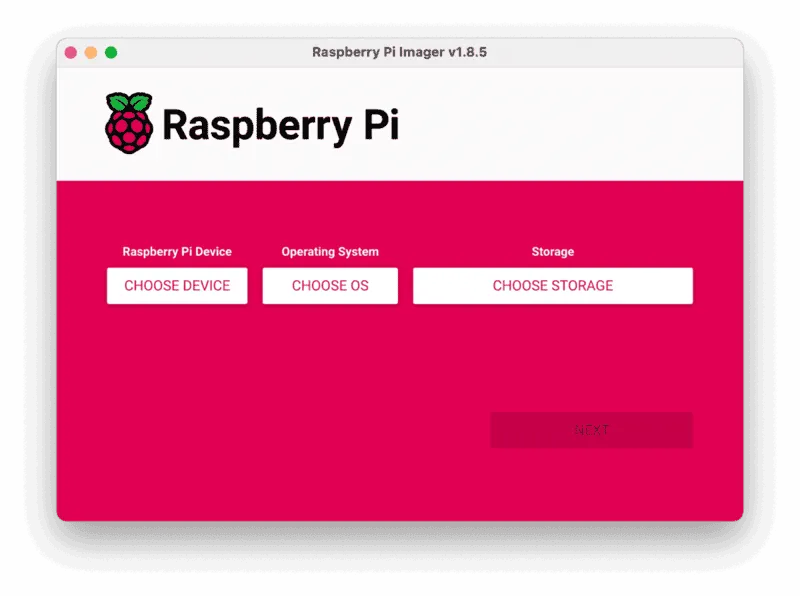
- Click CHOOSE DEVICE. Select your model of Pi, which is Raspberry Pi 4.
- Click CHOOSE OS. Select Raspberry Pi OS (64-bit) from the menu.
- Click CHOOSE STORAGE. From the list of devices, select the storage device you intend to use in your Raspberry Pi.
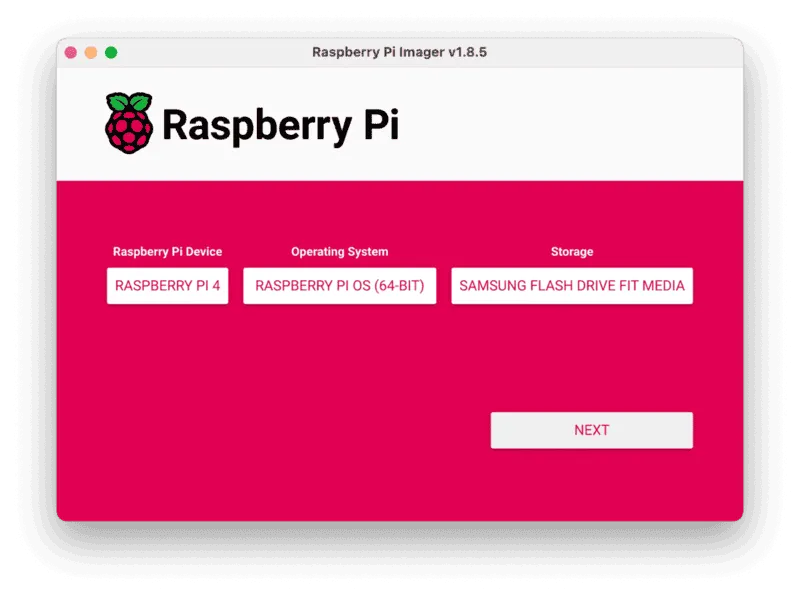
- Configure your Raspberry Pi for remote access. Click Next. When prompted to apply OS customization settings, select EDIT SETTINGS.
- Check Set hostname and enter the name you would like to access the Pi by in that field, for example,
test. - Select the checkbox for Set username and password and set a username (for example, your first name) that you will use to log into the Pi. If you skip this step, the default username will be
pi(not recommended for security reasons). And specify a password. - Connect your Pi to Wi-Fi so that you can run
viam-serverwirelessly. Check Configure wireless LAN and enter your wireless network credentials. SSID (short for Service Set Identifier) is your Wi-Fi network name, and password is the network password. Change the sectionWireless LAN countryto where your router is currently being operated.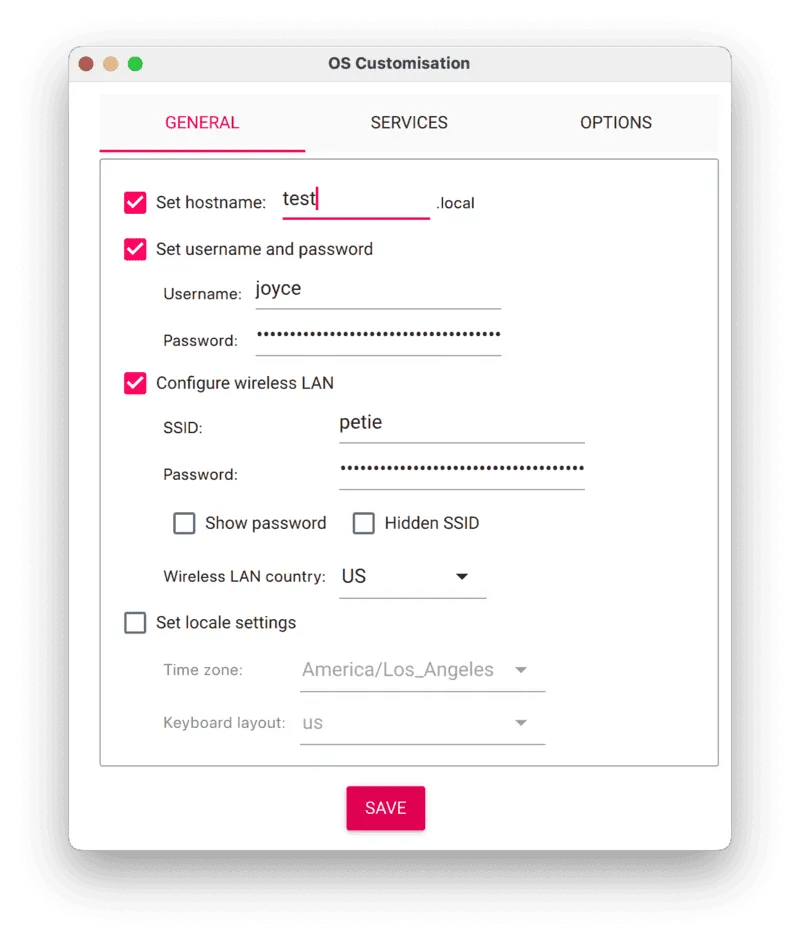
- Select the SERVICES tab, check Enable SSH, and select Use password authentication.
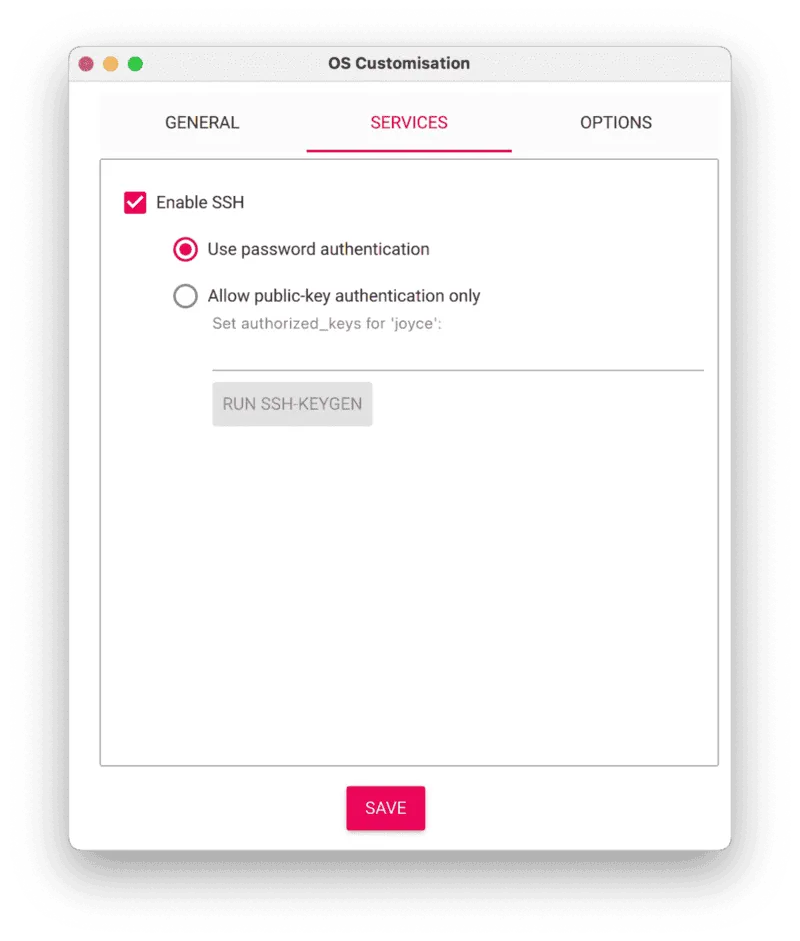
- Save your updates, and confirm
YESto apply OS customization settings. ConfirmYESto erase data on your storage device. You may also be prompted by your operating system to enter an administrator password. After granting permissions to the Imager, it will begin writing and then verifying the Linux installation to your storage device. - Remove the storage device from your computer when the installation is complete.
Connect with SSH
- Place the storage device into your Raspberry Pi and boot the Pi by plugging it in to an outlet. A red LED will turn on to indicate that the Pi is connected to power.
- Once the Pi is started, connect to it with SSH. From a command line terminal window, enter the following command. The text in <> should be replaced (including the < and > symbols themselves) with the user and hostname you configured when you set up your Pi.
ssh <USERNAME>@<HOSTNAME>.local - If you are prompted "Are you sure you want to continue connecting?", type "yes" and hit enter. Then, enter the password for your username. You should be greeted by a login message and a command prompt.
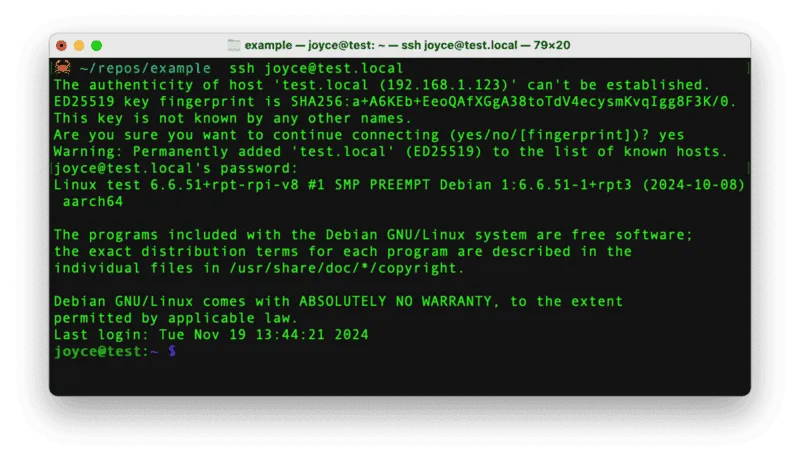
- Update your Raspberry Pi to ensure all the latest packages are installed
sudo apt update
sudo apt upgrade
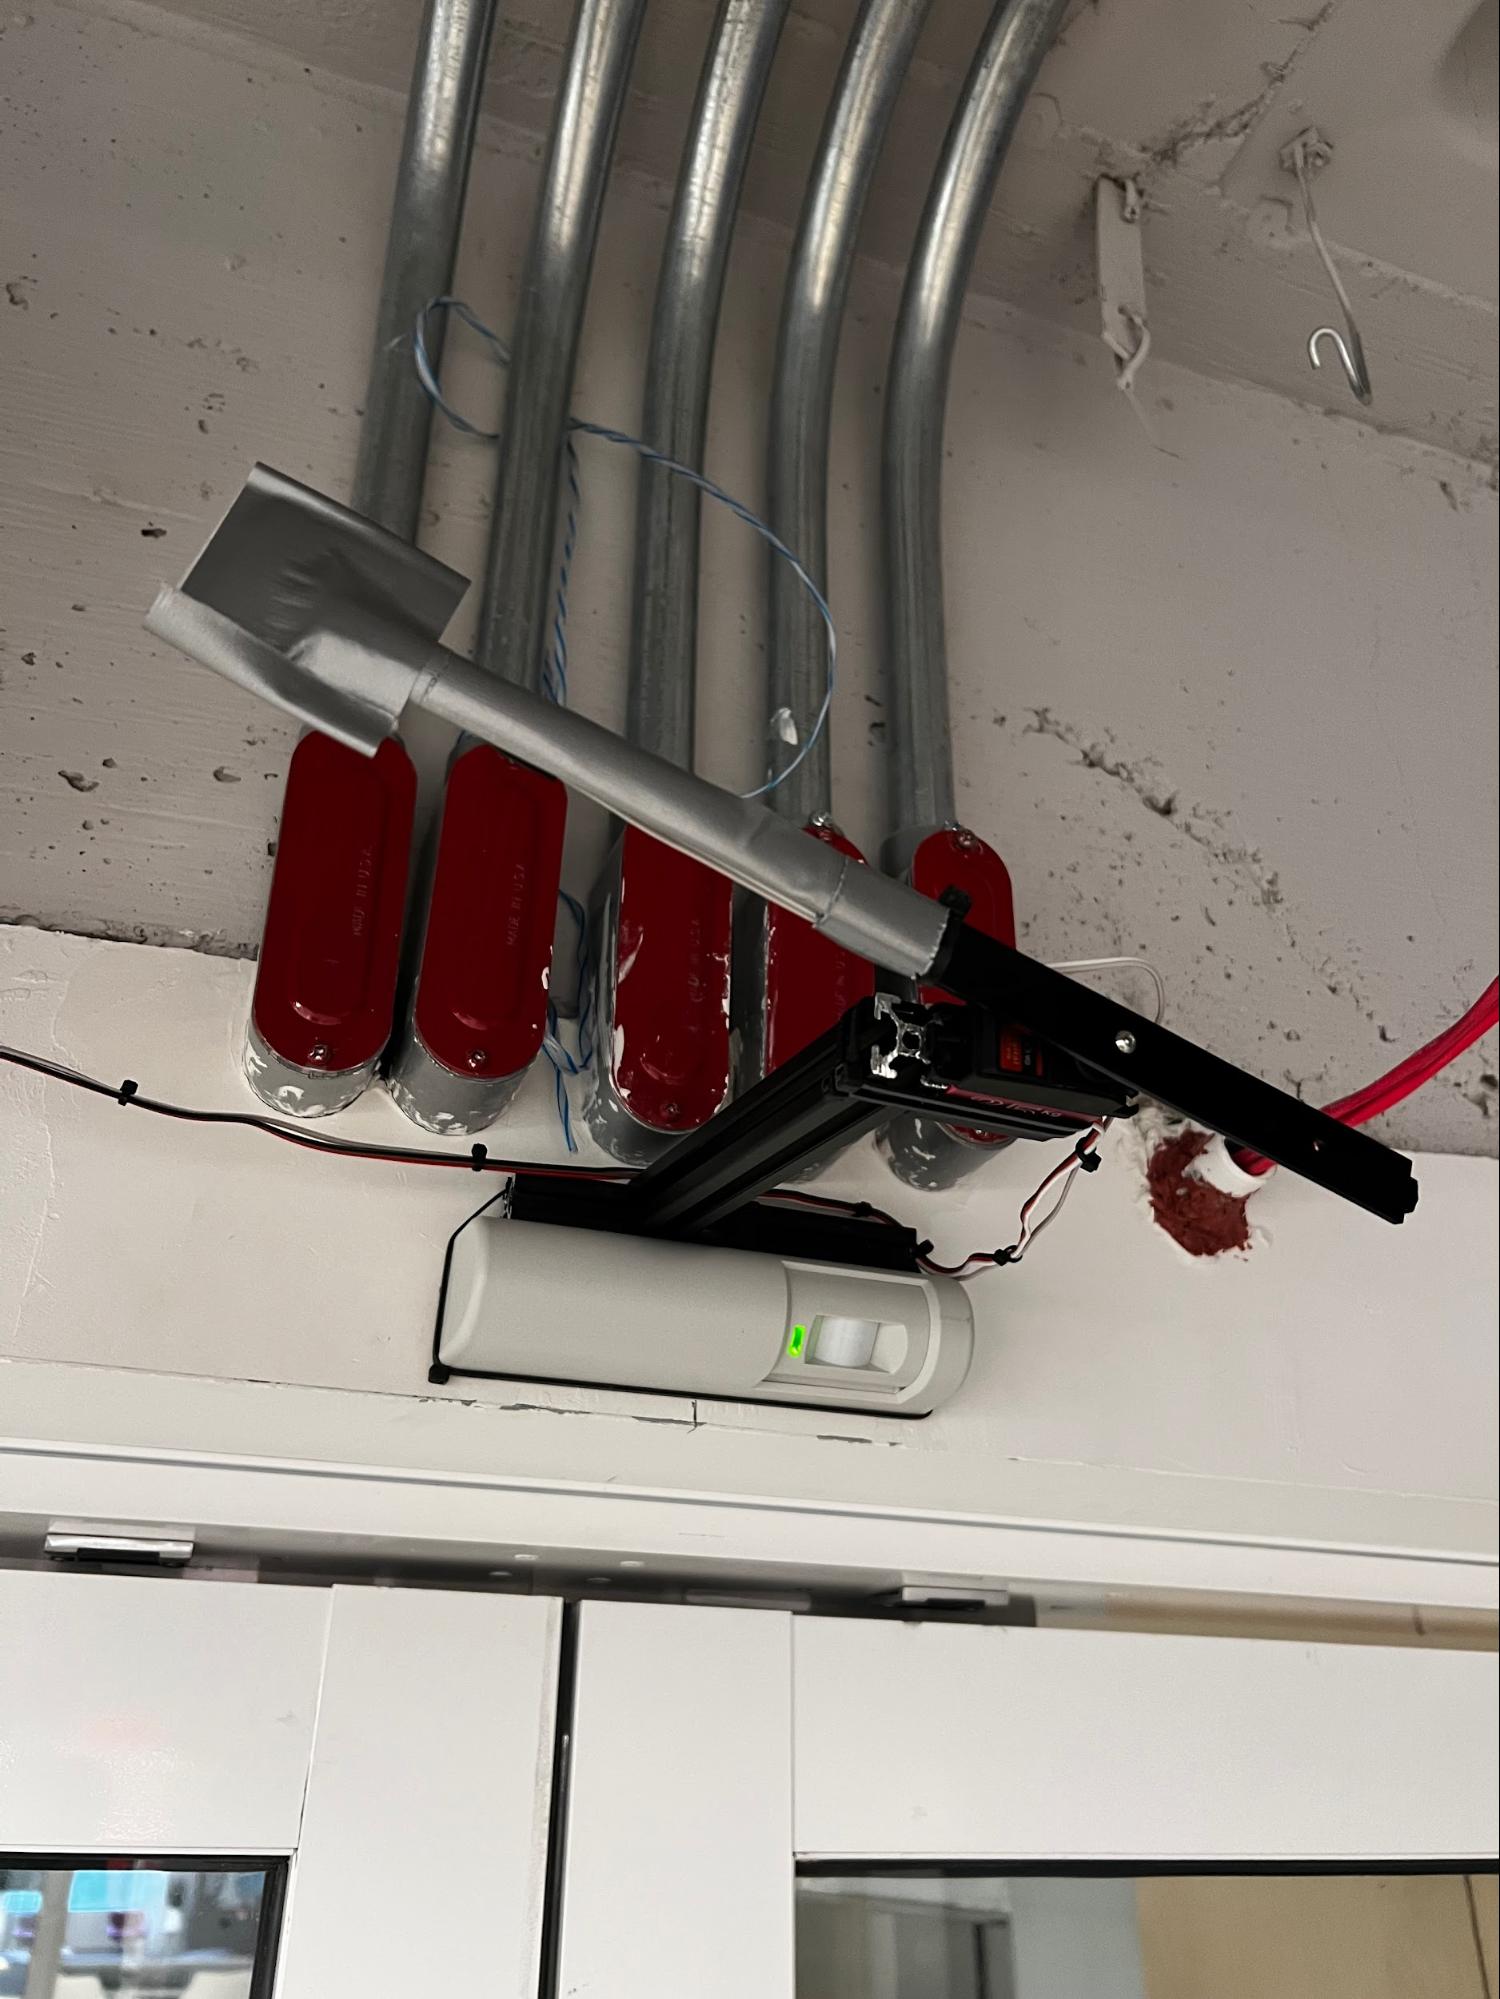
The Viam office currently uses a fob system to unlock a security door. By adding computer vision and facial recognition, we can verify that specific individuals are authorized to enter and automatically unlock the door. In this setup, a webcam can be mounted above the door to detect faces. When an authorized face is recognized, a servo waves a heated pad in front of a PIR motion sensor (originally intended for people leaving the office) to trigger the door to unlock.
Your door setup may differ, so this section may need to be adjusted based on your specific configuration.
Add your servo
- Wire the servo to the Raspberry Pi: The servo can be controlled via a GPIO pin on the Raspberry Pi. Refer to the following wiring diagram to connect the Raspberry Pi to the servo and heated pad.
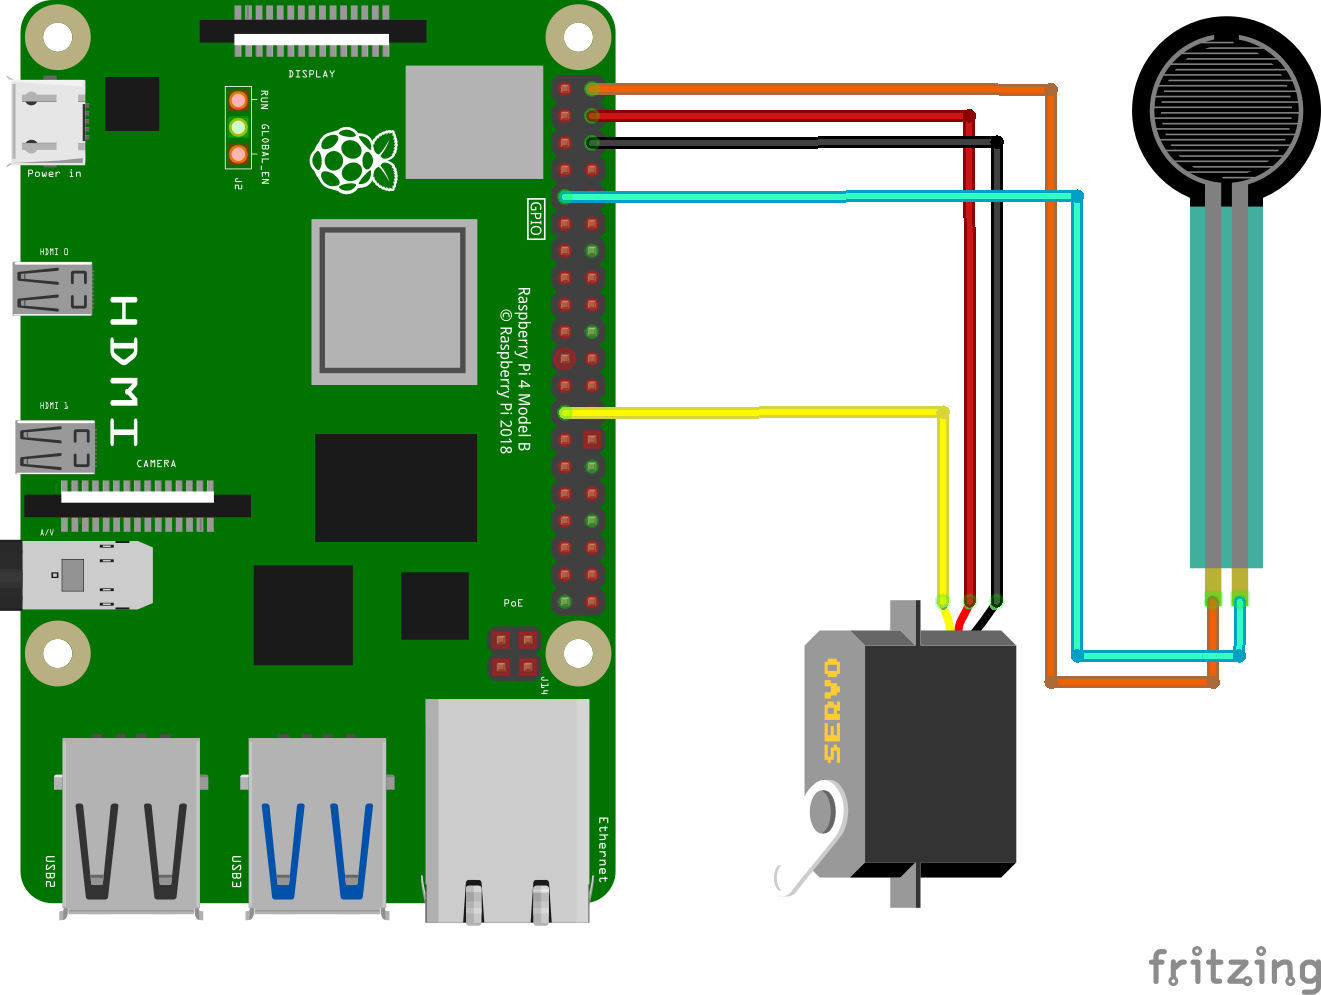
Raspberry Pi
Servo and Heated pad
Pin 2 (5V)
Power for heated pad
Pin 4 (5V)
Power for servo
Pin 6 (Ground)
GND for servo
Pin 9 (Ground)
GND for heated pad
Pin 16 (GPIO 23)
GPIO for servo
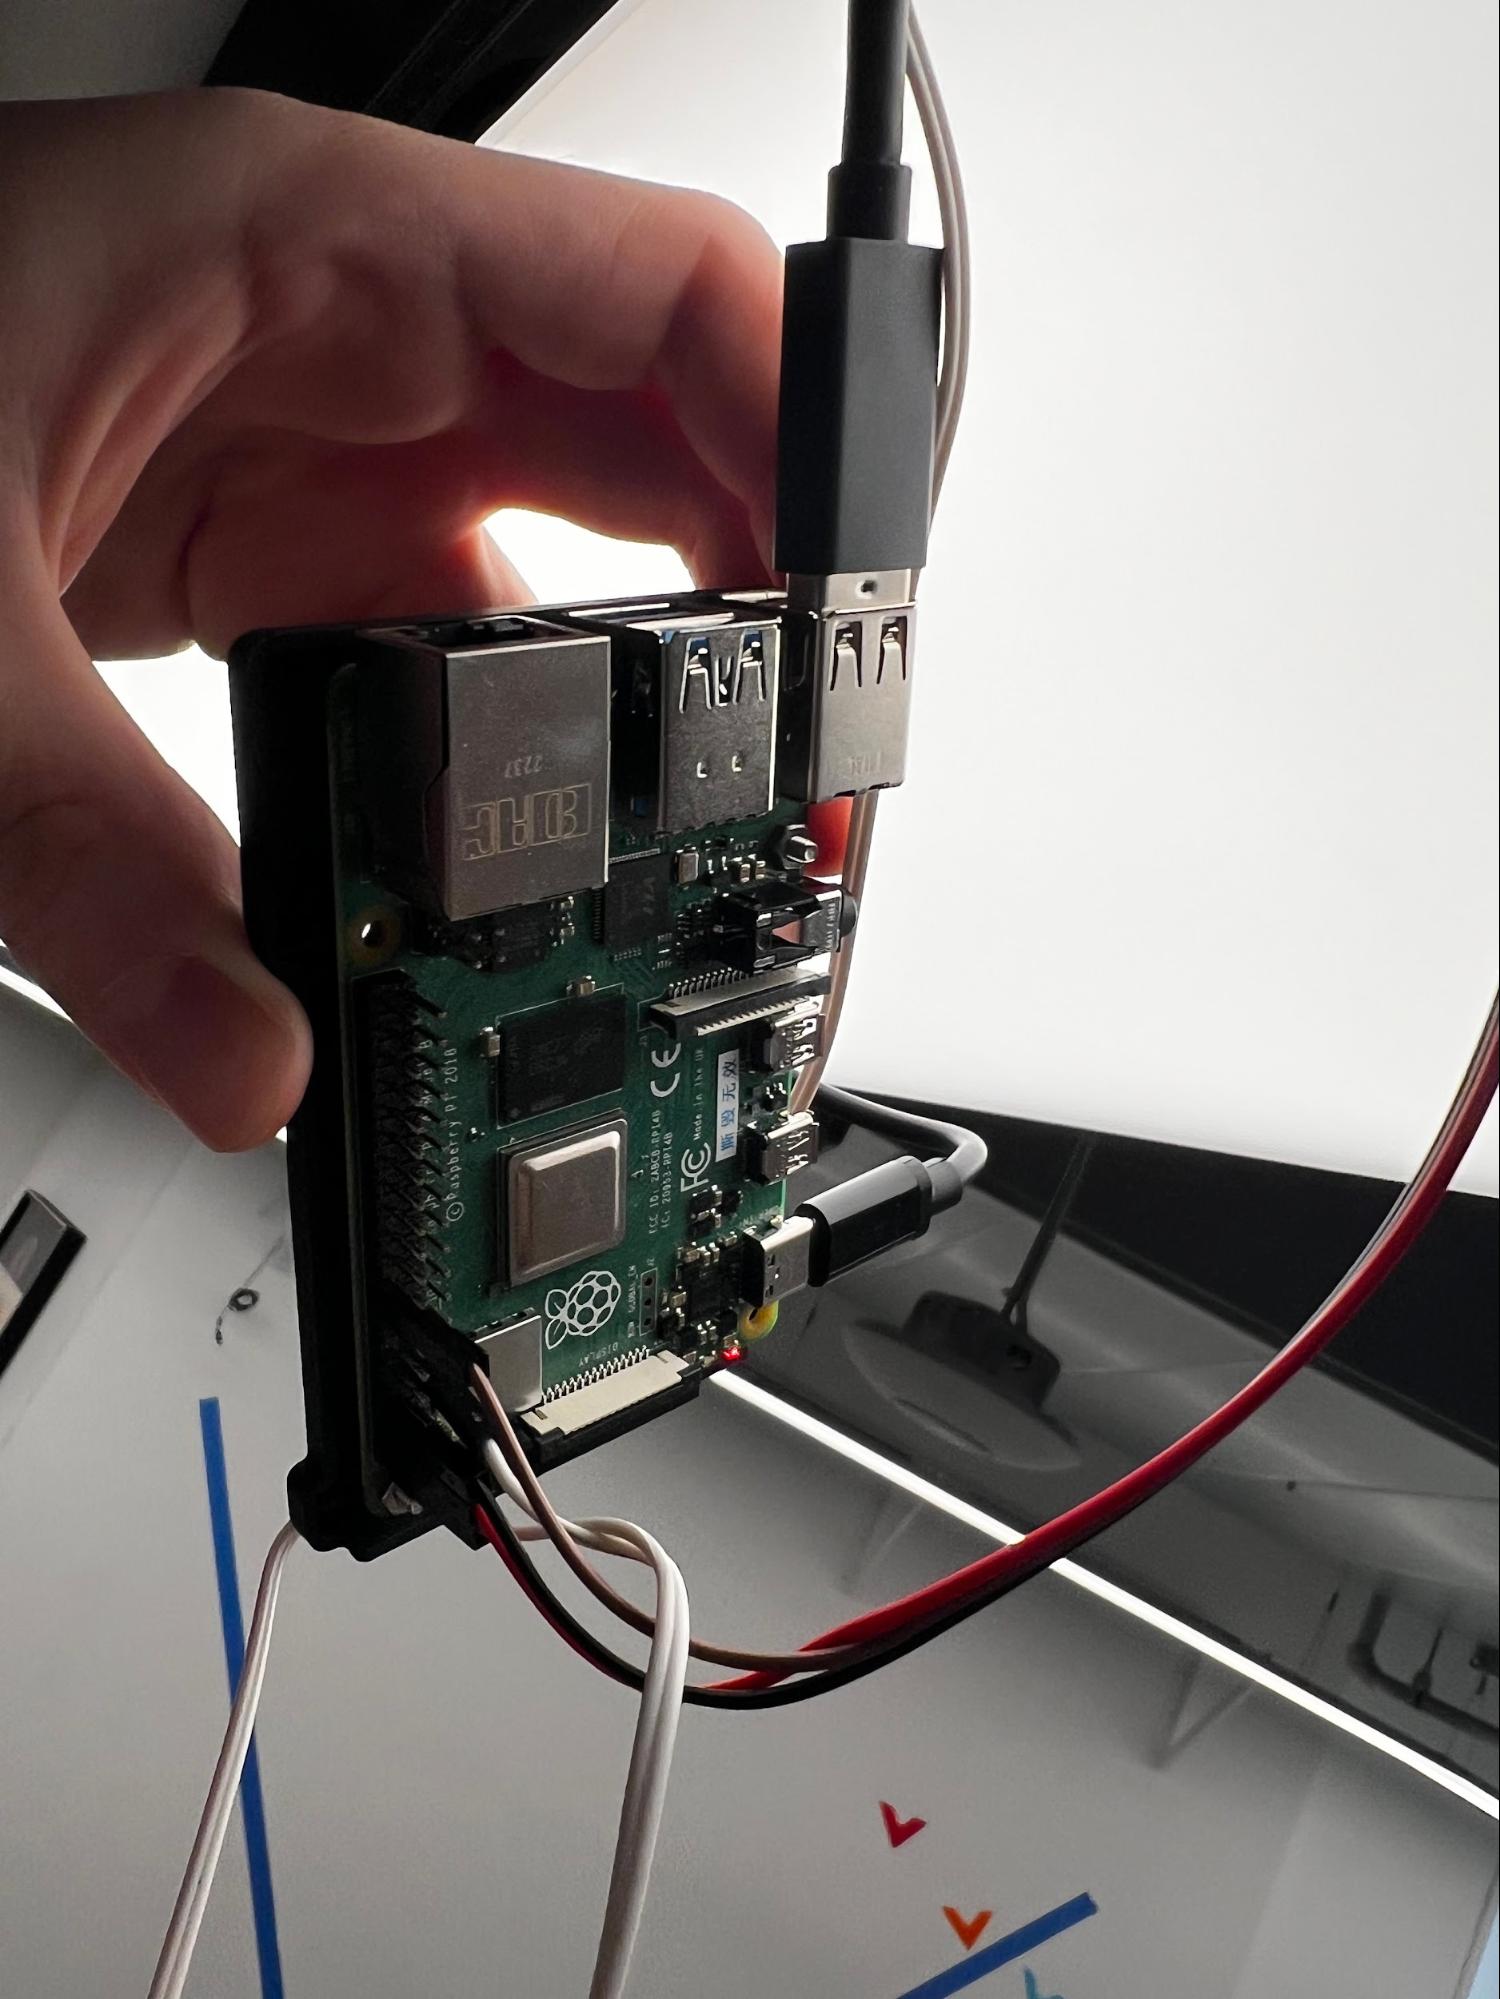
Now that you have physically connected the hardware components, let's configure the software in the next section.
Configure your machine
- In the Viam app under the LOCATIONS tab, create a machine by typing in a name and clicking Add machine.

- Click View setup instructions.
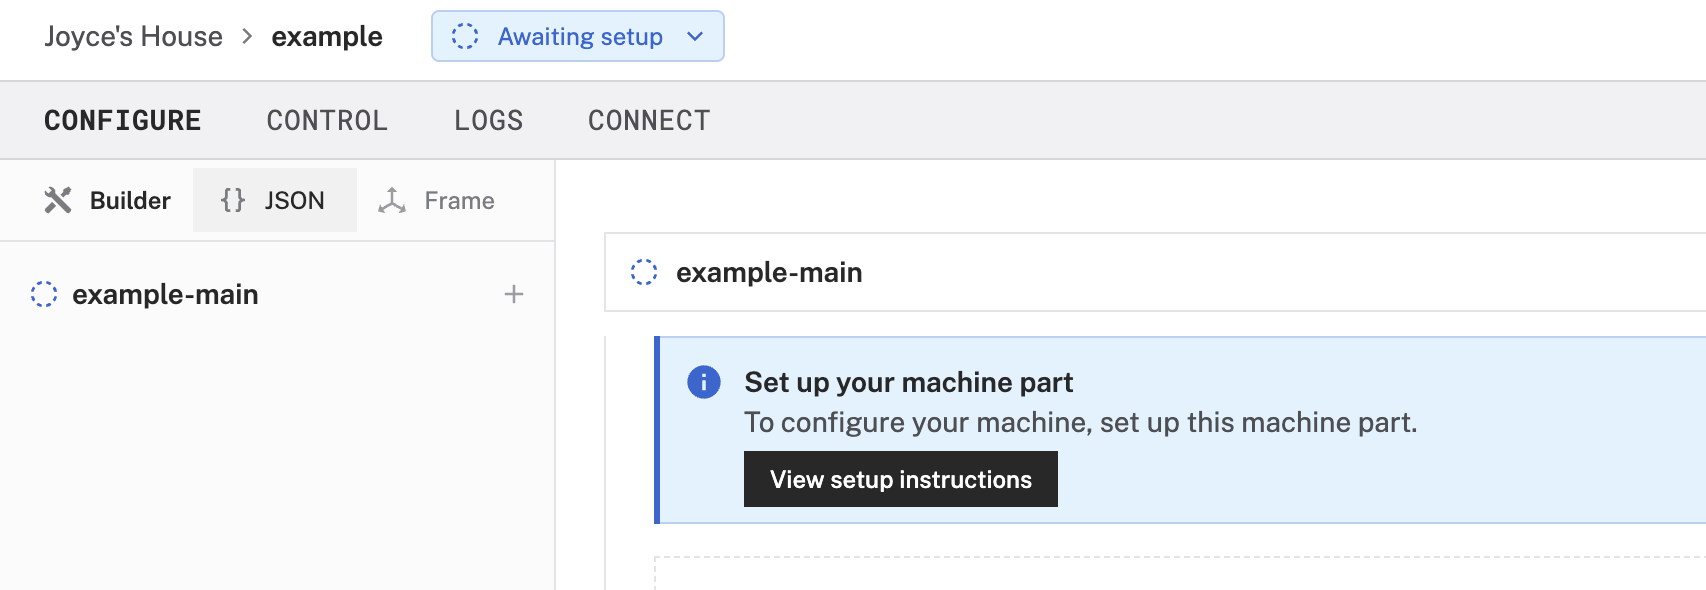
- To install
viam-serveron the Raspberry Pi device that you want to use to communicate with and control your webcam, select theLinux / Aarch64platform for the Raspberry Pi, and leave your installation method asviam-agent.
- Use the
viam-agentto download and installviam-serveron your Raspberry Pi. Follow the instructions to run the command provided in the setup instructions from the SSH prompt of your Raspberry Pi.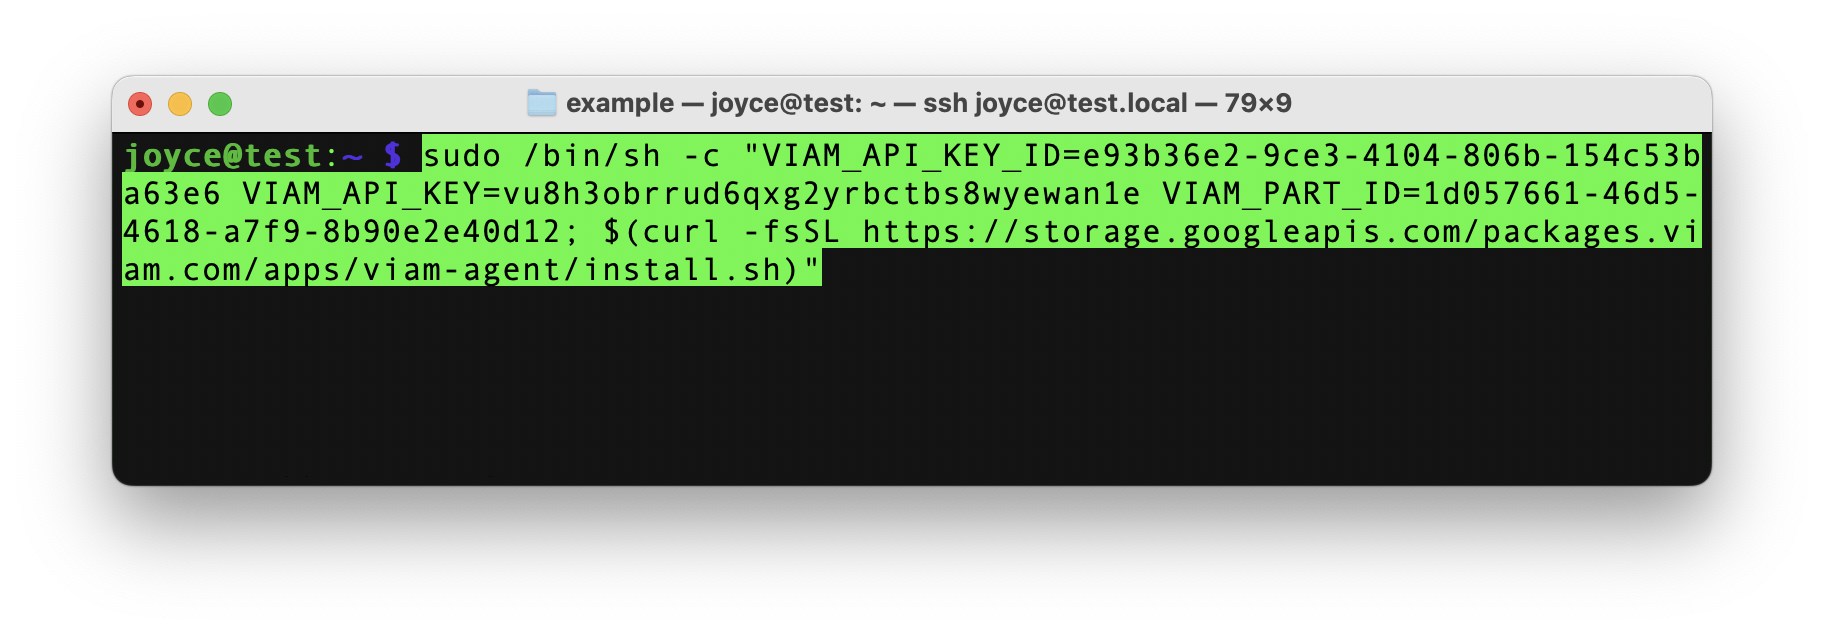
- The setup page will indicate when the machine is successfully connected.

Configure your Raspberry Pi board
To access the GPIO pins, let's add our Raspberry Pi board to our machine in the Viam app.
- In the Viam app, find the CONFIGURE tab.
- Click the + icon in the left-hand menu and select Component.
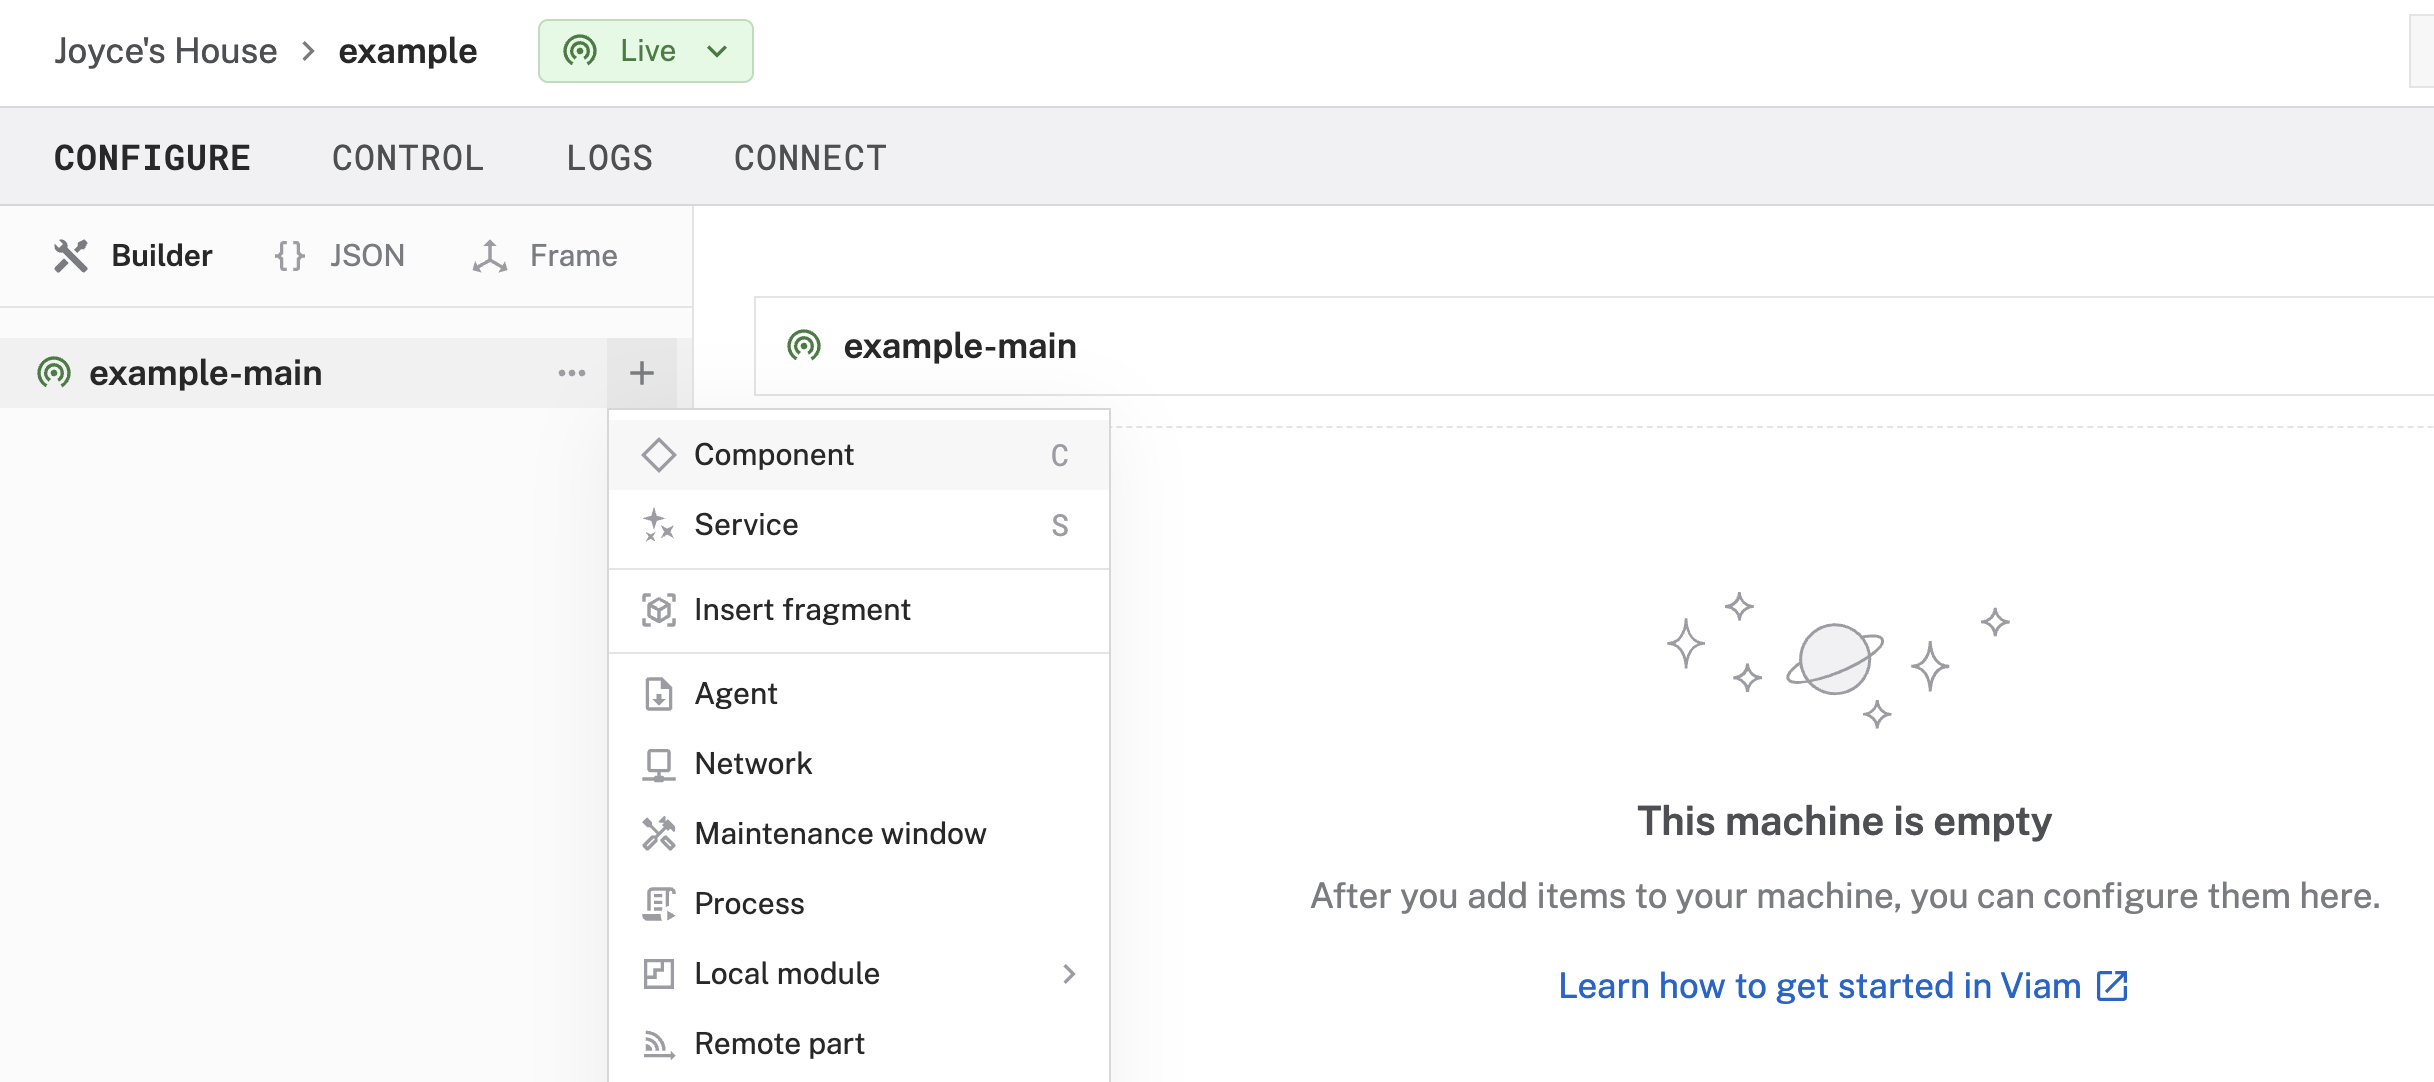
- Select
board, and find theraspberry-pi:rpi4module. This adds the module for working with the Raspberry Pi 4's GPIO pins. Leave the default nameboard-1for now. - Notice adding this module adds the board hardware component called
board-1. The collapsible card on the right corresponds to the part listed in the left sidebar.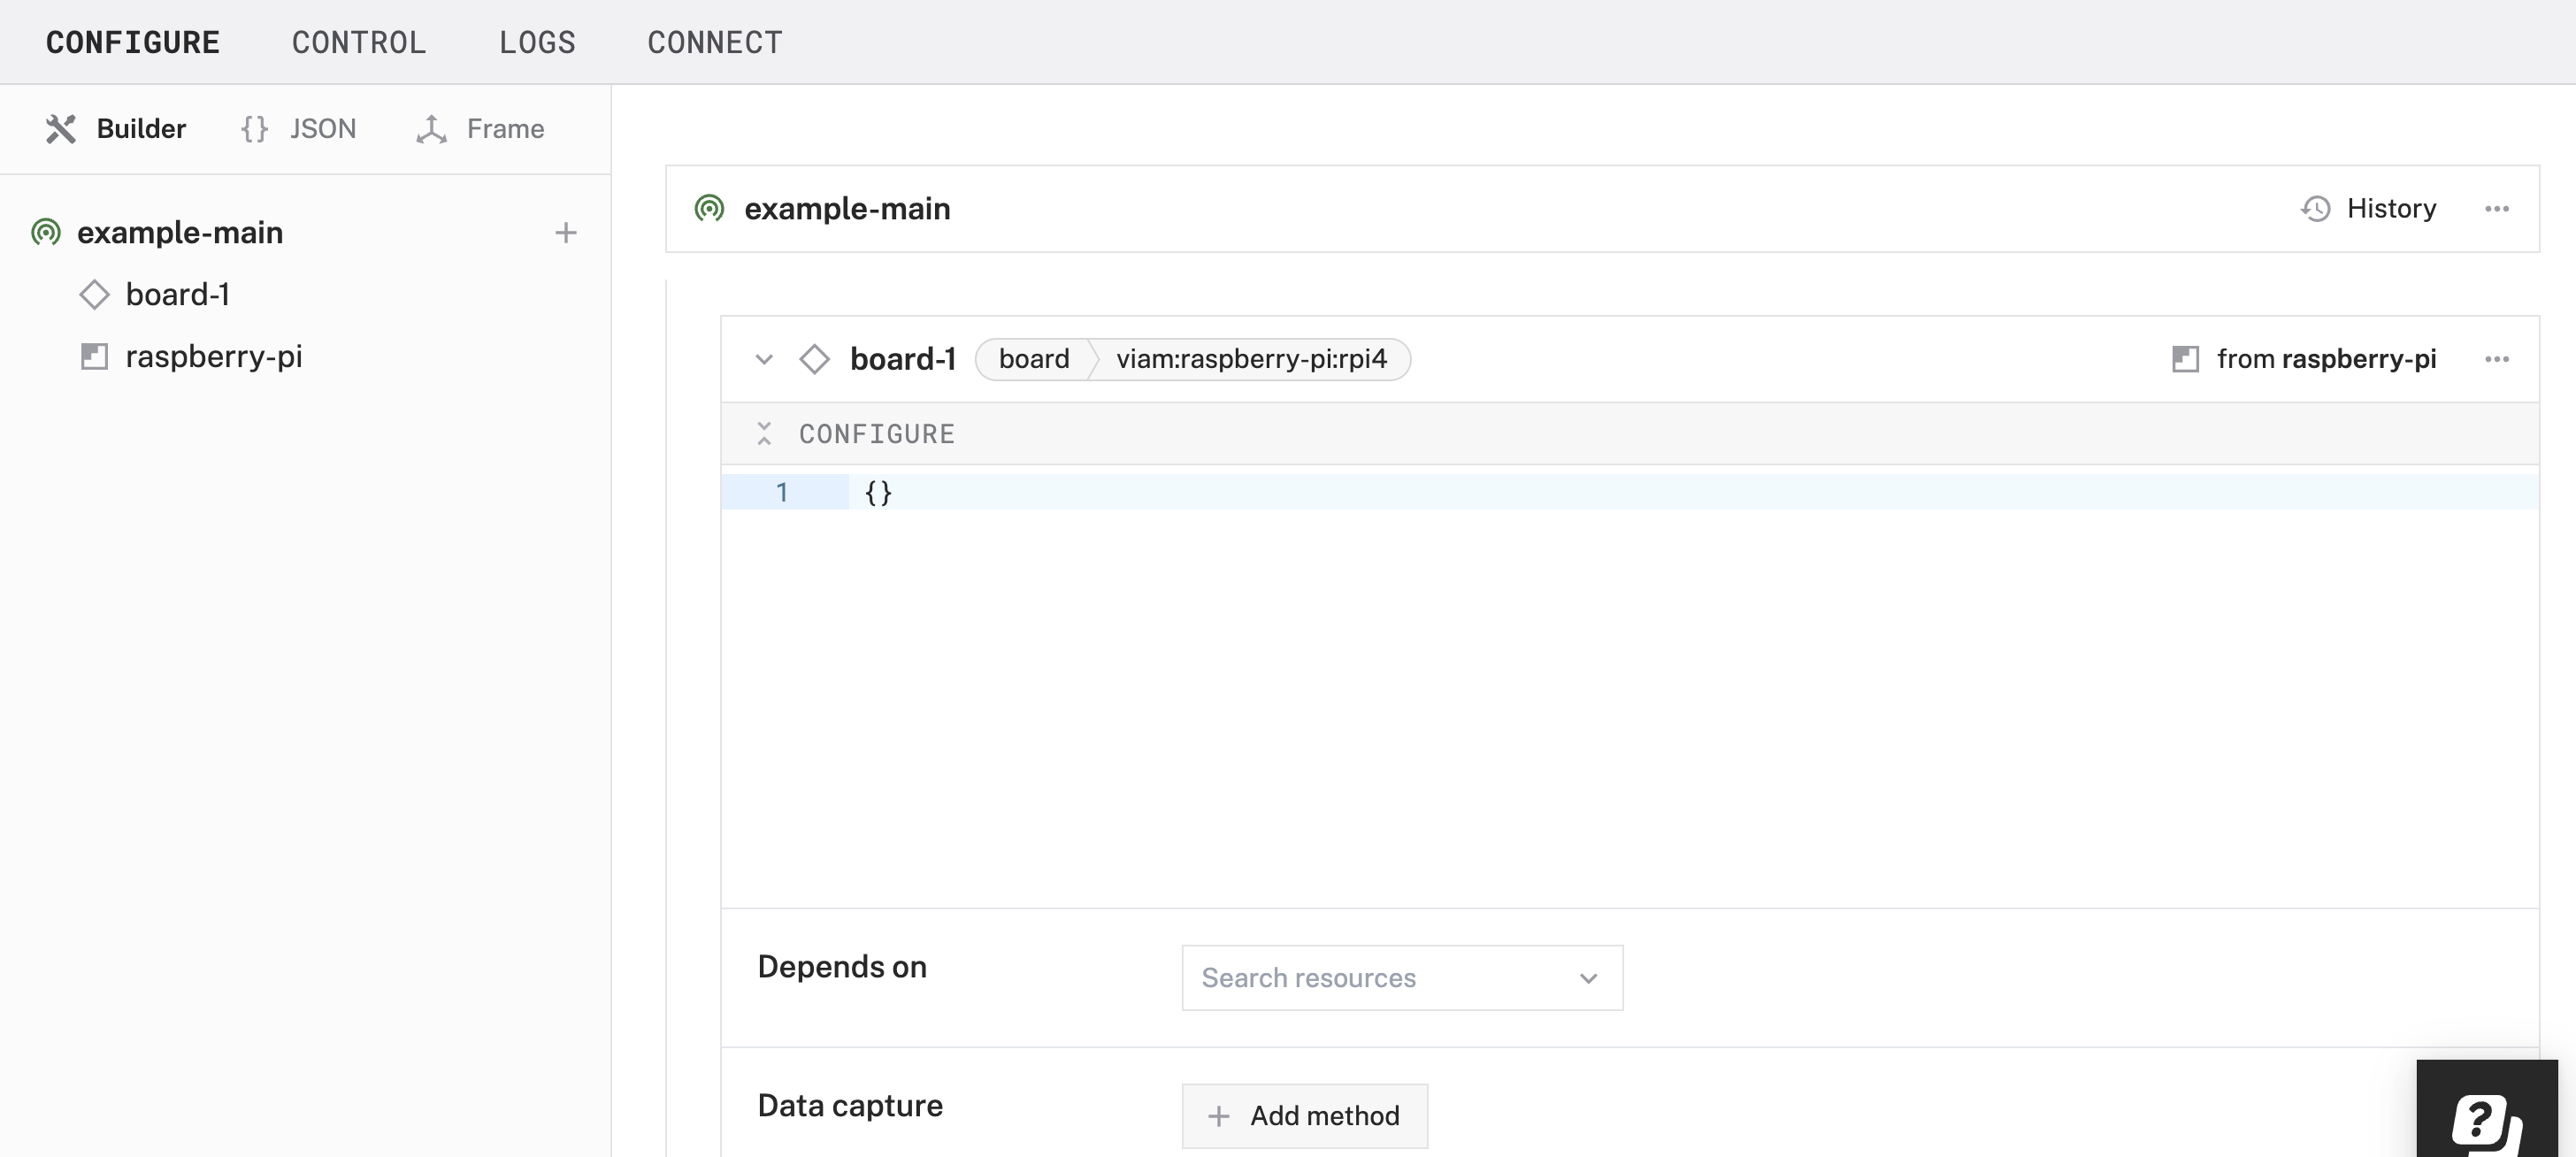
- Click Save in the top right to save and apply your configuration changes.
Configure your servo
- In the Viam app, find the CONFIGURE tab.
- Click the + icon in the left-hand menu and select Component.
- Select
servo, and find thegpiomodule. This adds the module for working with the servo using the Raspberry Pi 4's GPIO pins. Leave the default nameservo-1for now. - Notice adding this module adds the board hardware component called
servo-1. The collapsible card on the right corresponds to the part listed in the left sidebar. - Under the Attributes section, select
board-1as the Raspberry Pi board, and input16as the physical pin number on the Raspberry Pi where we will be controlling the servo motor. - Click Save in the top right to save and apply your configuration changes.
- Expand the TEST section to make sure you can control the servo using the current configuration.
Add and configure your USB webcam
- Connect the USB webcam to the Raspberry Pi.
- In the Viam app, find the CONFIGURE tab.
- Click the + icon in the left-hand menu and select Component.
- Select
camera, and find thewebcammodule. This adds the module for working with a USB webcam. Leave the default namecamera-1for now. - Notice adding this component adds the webcam hardware component called
camera-1. The collapsible panel on the right corresponds to the part listed in the left sidebar. - Under Attributes, leave the
video_pathblank and the camera will use the default video path for your machine. If this doesn't work when you test your camera later, you can try a different video path by following the prompt in the Viam app to add a webcam discovery service and identify path options. - Click Save in the top right to save and apply your configuration changes.
- At the bottom of the
camera-1panel, expand the TEST section to ensure you have configured the camera properly.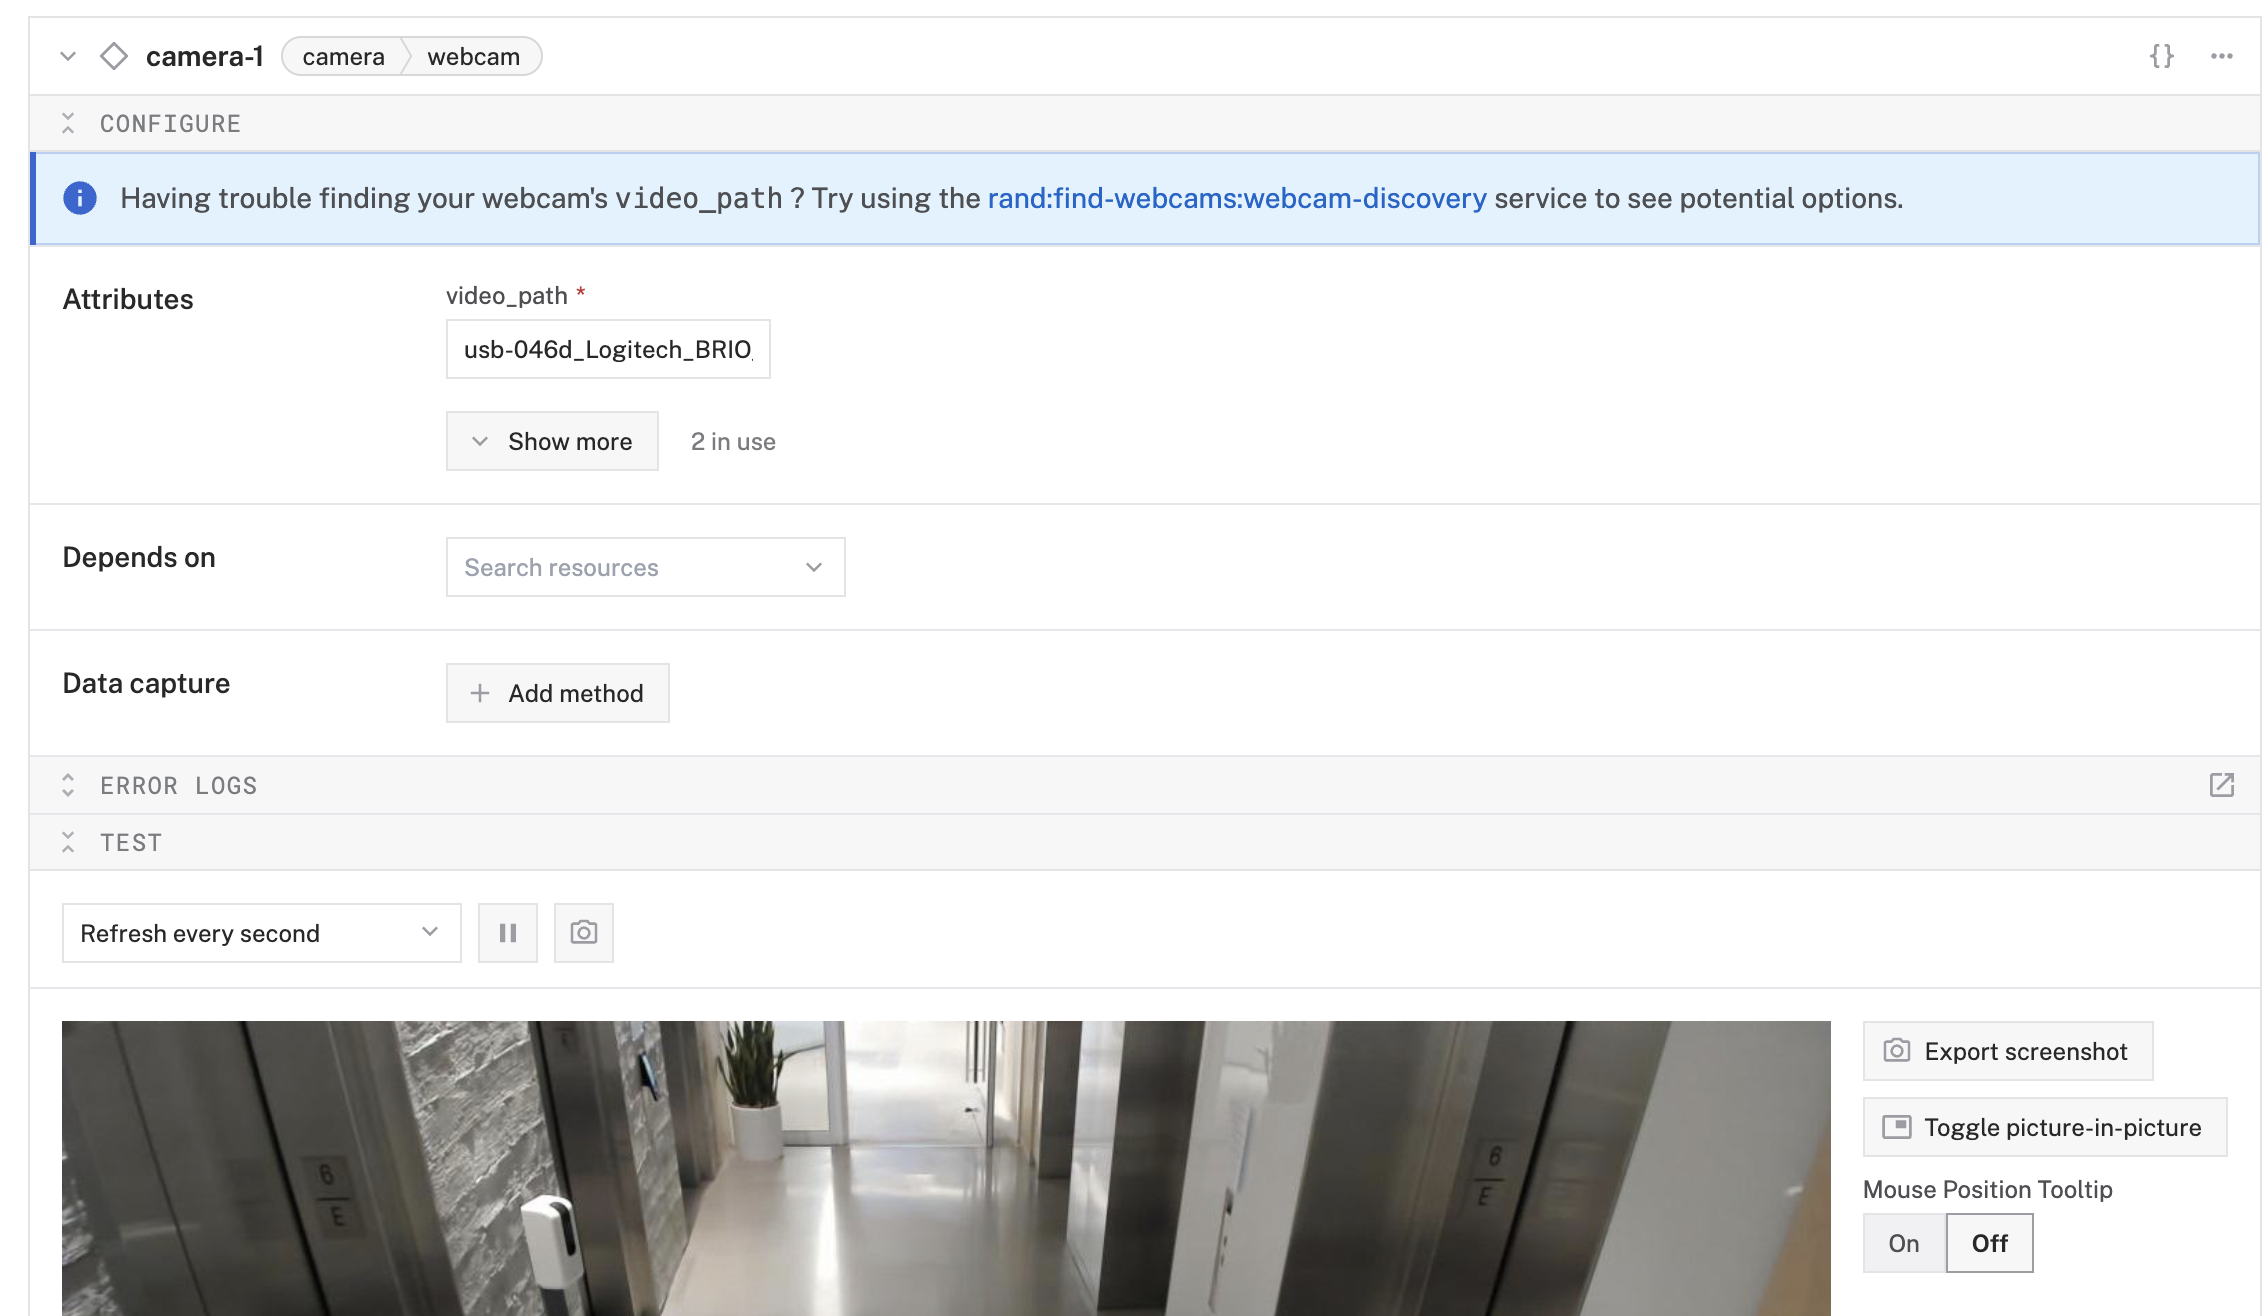
Now that your hardware is working the way you want it, it's time to add a vision service to detect and identify a face.
Prepare your machine to run the control code
- SSH into your board: From the terminal window, run the following command to SSH (Secure Shell) into your board, where the text in
<>should be replaced (including the<and>symbols themselves) with theuserandhostnameyou configured when you set up your machine.ssh <USERNAME>@<REMOTE-HOSTNAME>.local - On the Raspberry Pi, create a directory called
known_facesto store photos of people who are allowed access to the office.mkdir known_faces - Verify the directory location: the directory is located within the home directory of the user
jonchain this example. Running the following command results in/home/joncha/so we know the full path to the directory is/home/joncha/known_faces. We will need this path in an upcoming step.pwd
Configure a vision service
- In the Viam app, click the + icon in the left-hand menu and select Service, and then
vision. - Search for a module called
face-identification. Then click Add module, and Create a new vision service, renaming the service asface-identification.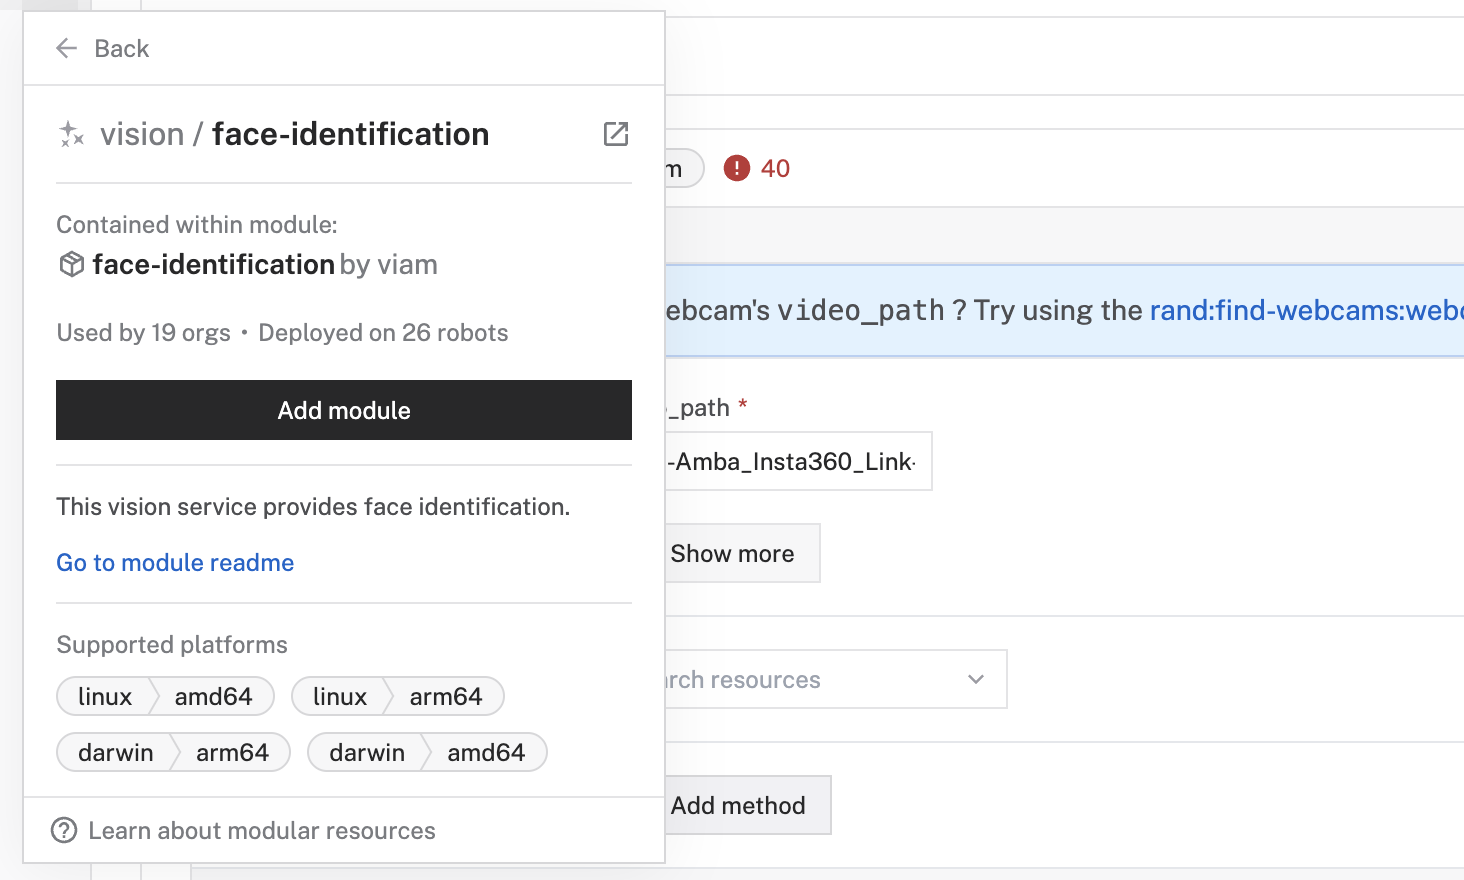
- Notice this creates two new items in the left sidebar. The first is your new vision service called
face-identificationbased on a module also calledface-identification.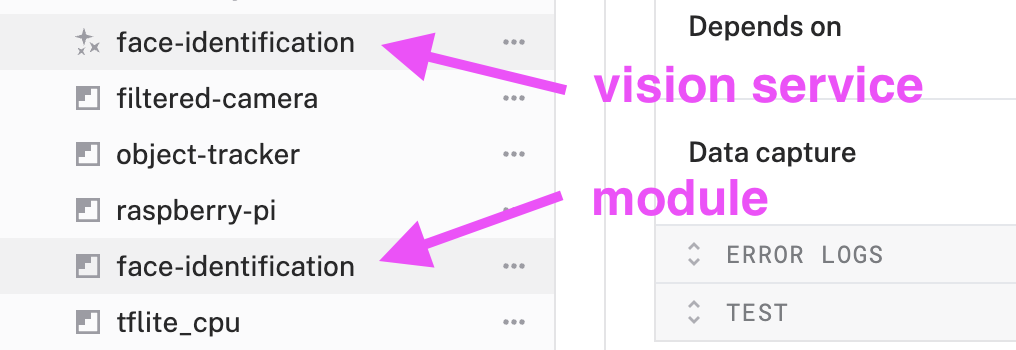
- In the
face-identificationpanel for the vision service under the CONFIGURE section, add the following attributes. This configures the vision service to depend on data coming in from the named webcam, refer to a directory ofknown_facesto be stored on the Raspberry Pi, and establish a sensitivity threshold for the vision service.{ "picture_directory": "/home/joncha/known_faces", "identification_threshold": 0.5, "camera_name": "camera-1" }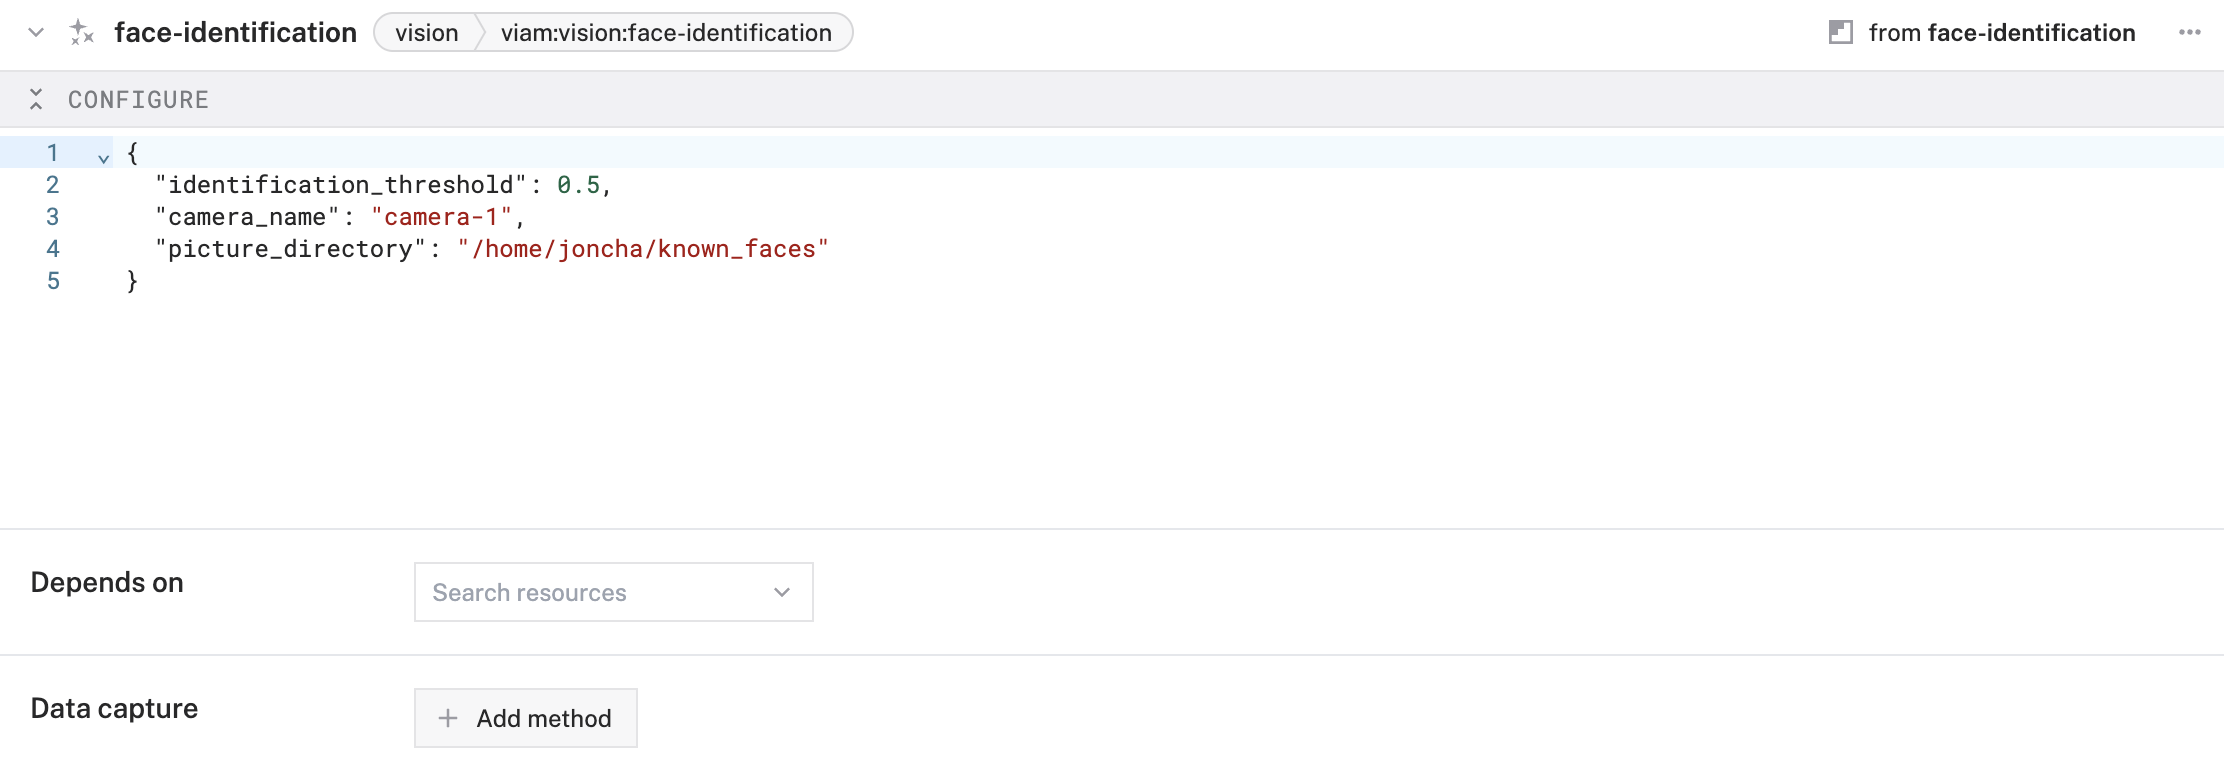
- Save your changes in the top right and wait a few moments for the configuration changes to take effect.
- At the bottom of the
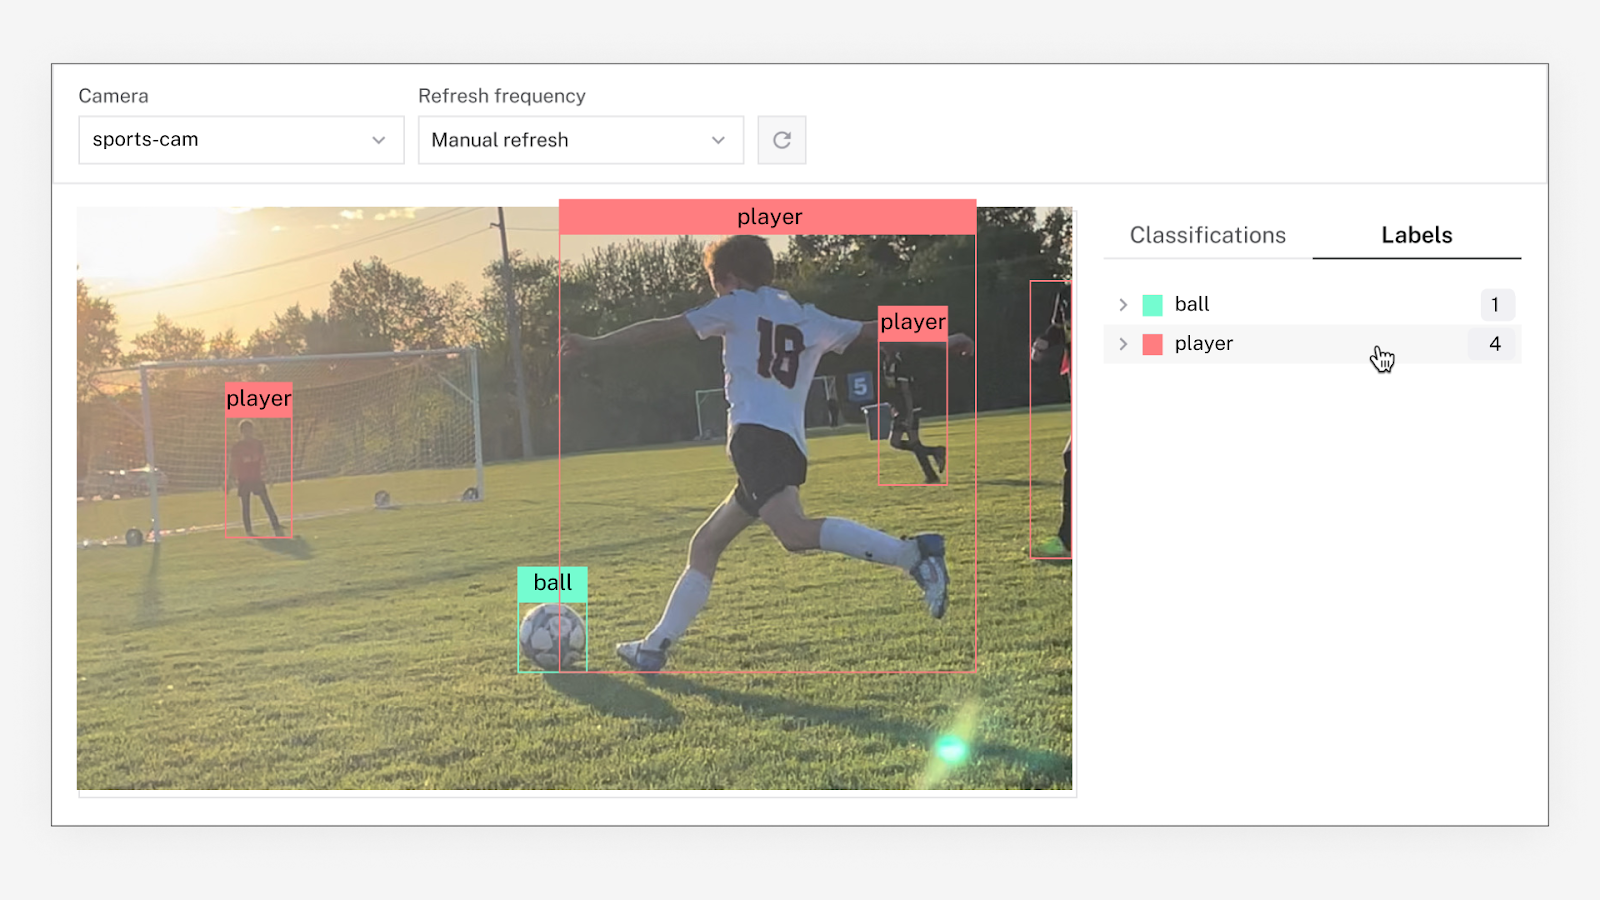
face-identificationvision service panel, expand the TEST section to ensure you have configured the vision service properly. Point the webcam towards a face to see if the camera detects it. - If the camera detects a face, a bounding box will highlight the item in the video feed, and display it on the right under Labels.
Configure an automation service
Next, let's set up a service to ensure the camera is always running the facial detection program. When a recognized face is detected, the servo will activate to unlock the door. If the face is not recognized, no action will be taken.
- In the Viam app, click the + icon in the left-hand menu and select Service, and then
generic. Then search for a module calledsecuribot:doorbot.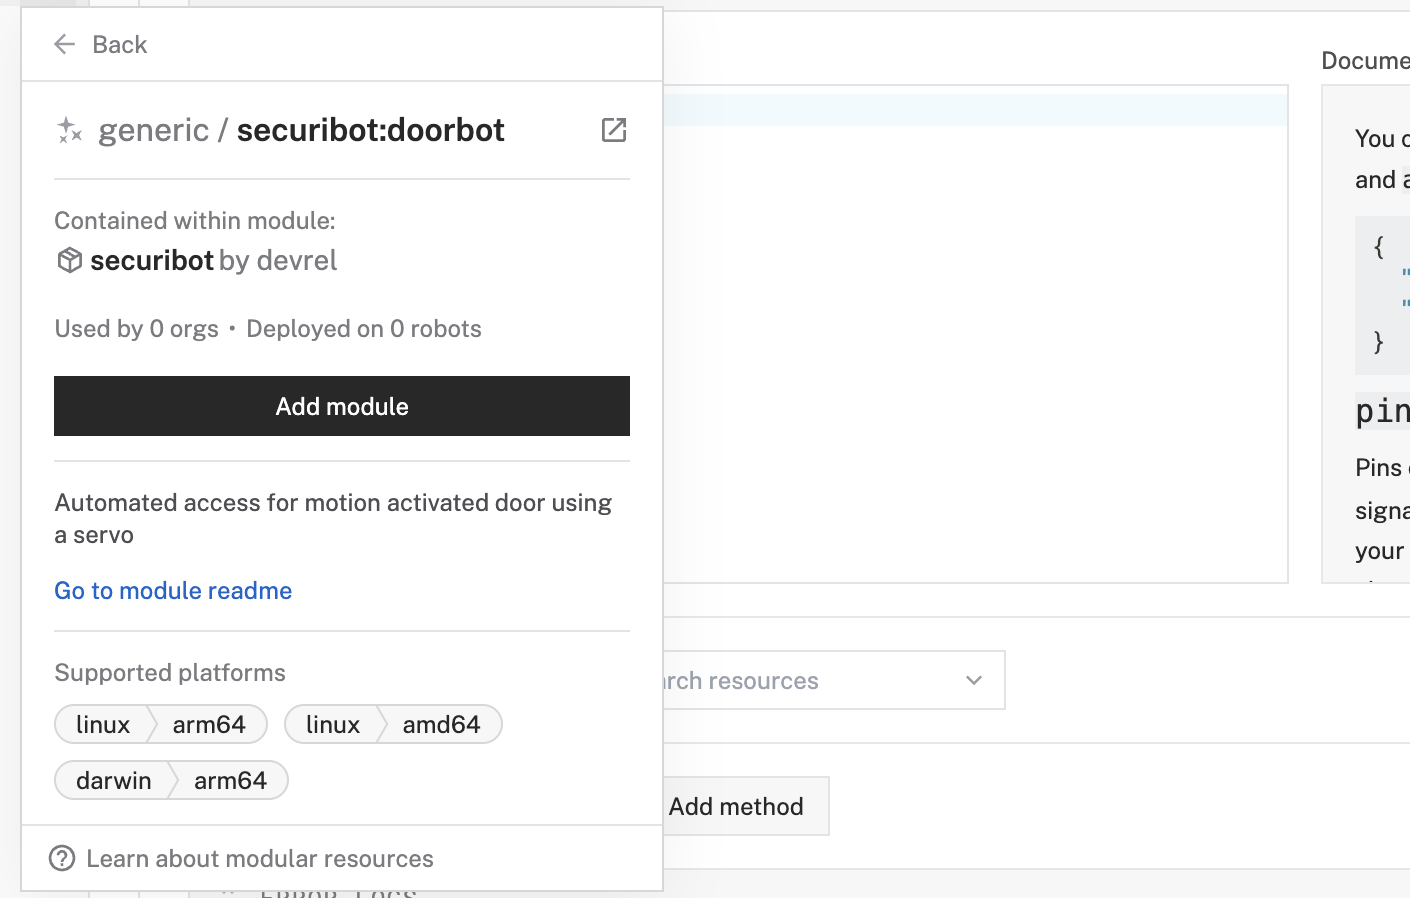
- Click Add module, and Create a new vision service, renaming the service as
automation. - Notice this creates two new items in the left sidebar. The first is your new generic service called
automationbased on a module calleddoorbot. - In the
automationpanel for the generic service under the CONFIGURE section, add the following attributes. This configures the service to depend on data coming in from the named webcam (camera-1), trigger the named servo (servo-1), and named vision service (face-identification).{ "camera_name": "camera-1", "servo_name": "servo-1", "vision_name": "face-identification" } - Save your changes in the top right and wait a few moments for the configuration changes to take effect.
Now that your servo is working as intended, it's time to tidy up the project and make it practical for real-world use.
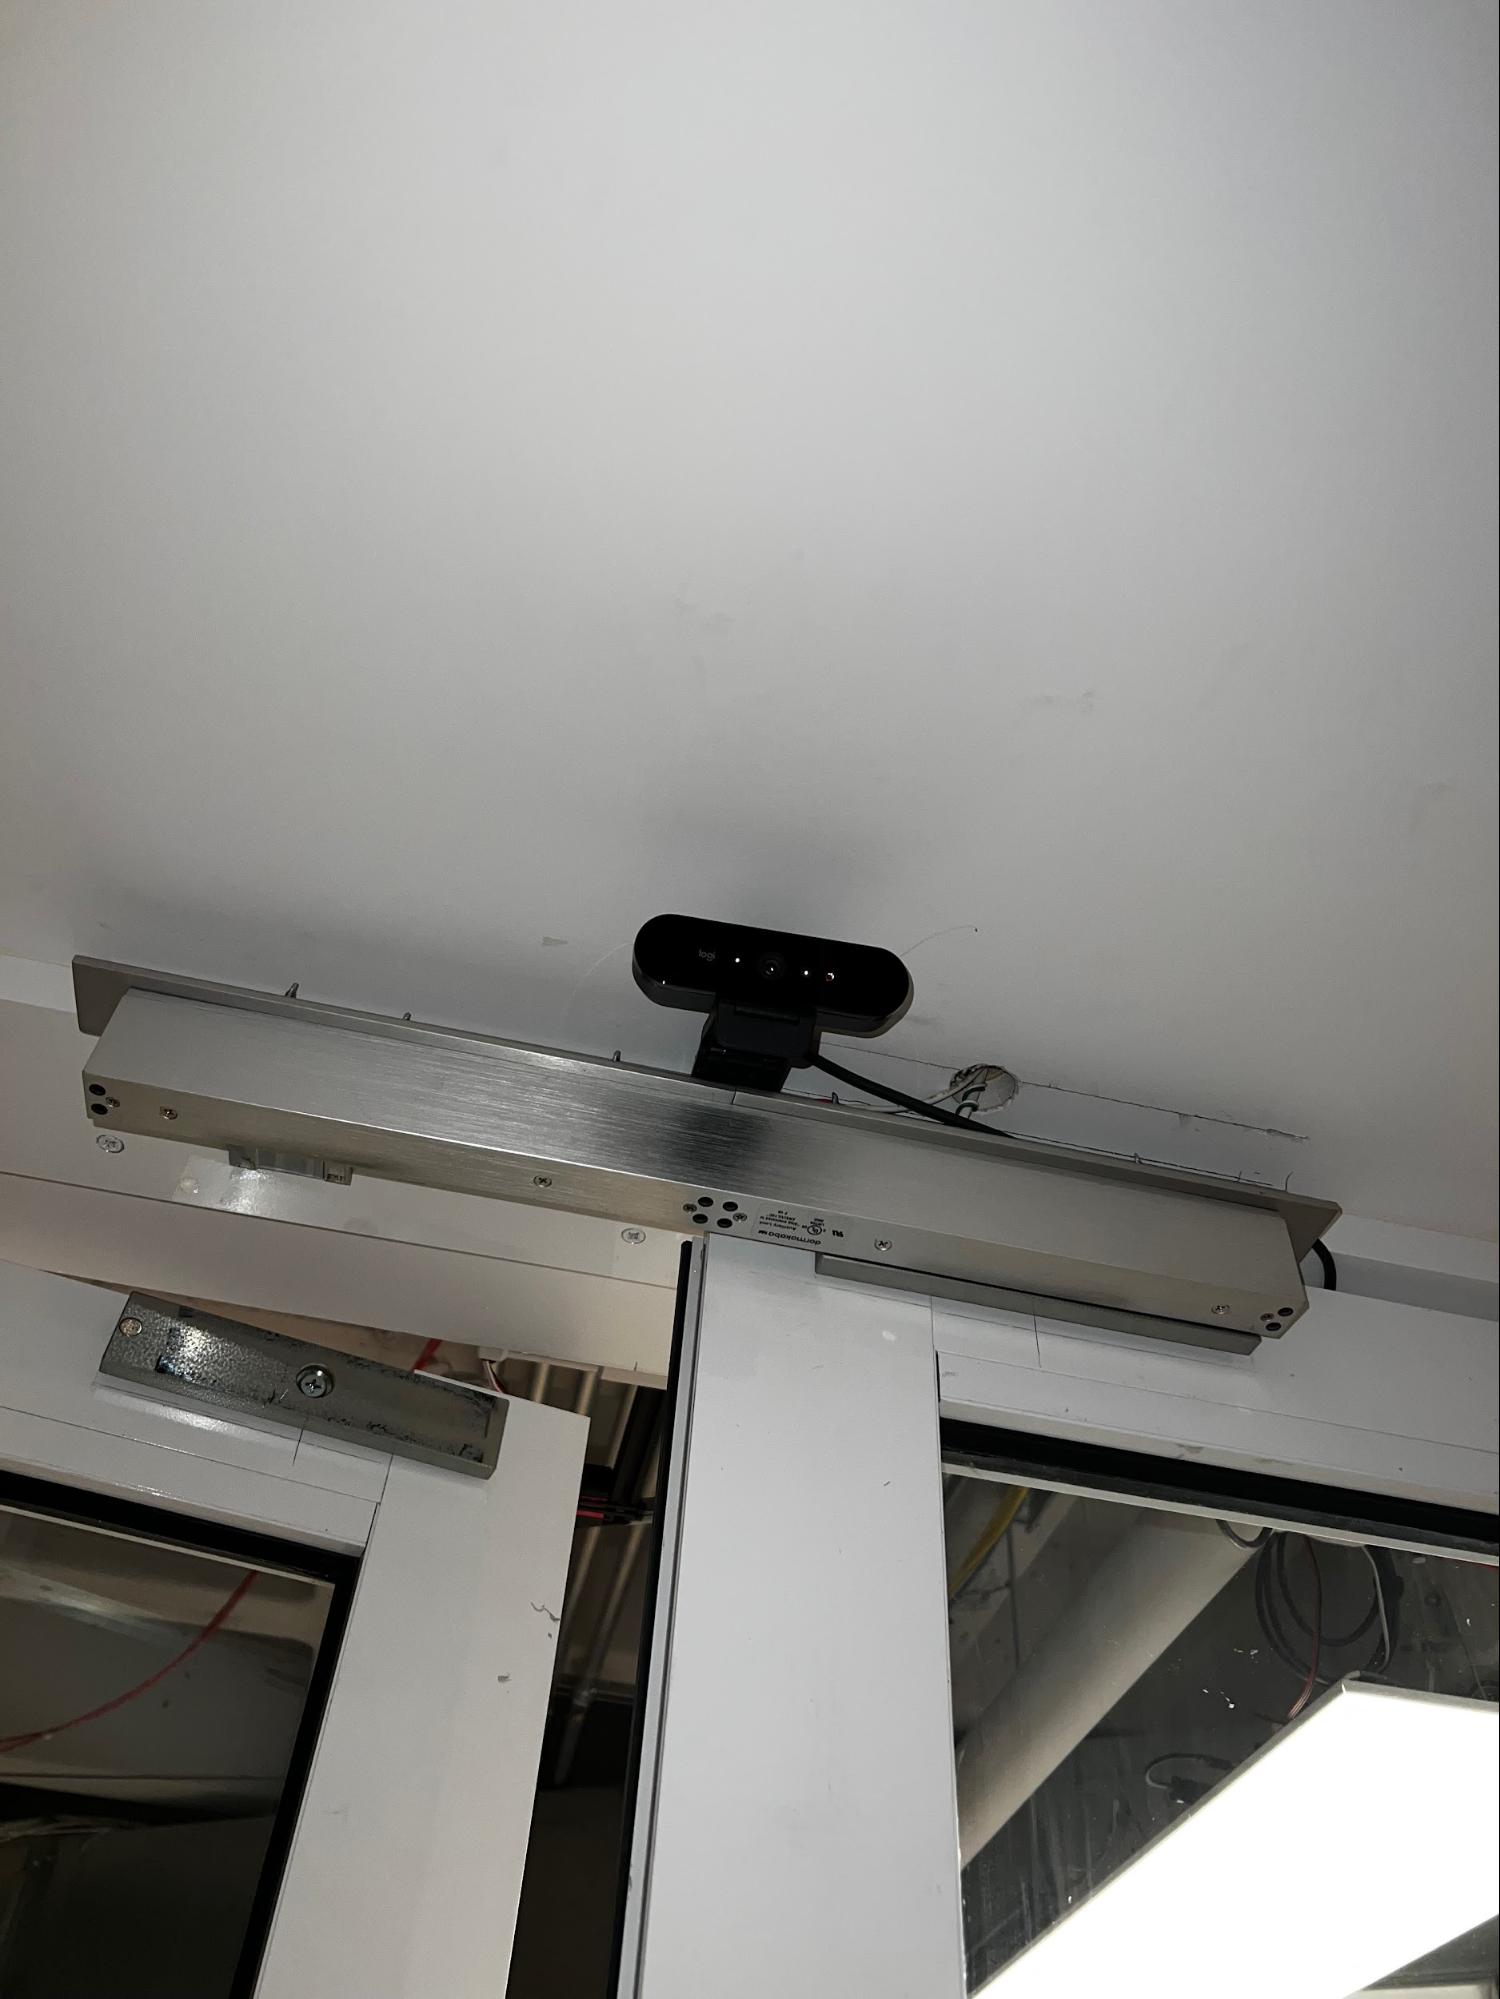
- Mount the webcam: Find a place outside the door to mount your webcam with a preferably unobstructed view of people's faces, for example, above a door frame.
- Mount the unlocking mechanism: For this scenario, we are mounting an arm connected to a heated pad to trigger an existing PIR sensor. This sensor was originally intended to enable access for people leaving the Viam office, but we are repurposing it to allow people to enter the office after verifying they are authorized access.
- Assemble an enclosure for the Pi: 3D print (or buy) an enclosure for your Raspberry Pi. I found an existing design that I liked to fit a Raspberry Pi 4 Model B that provides access to the GPIO pins.
- Tidy the wires: Neatly bundle the remaining wires using zip ties, twist ties, or cable clips to keep everything organized and out of the way.
What you learned
- How to configure and test a device's components using Viam
- How to use a vision service for image classification
- How to connect vision events to physical actions (like unlocking a door)
- How to integrate a Raspberry Pi, camera, and actuator for access control
Advanced scenarios for your facial recognition door system
- Access Logging and Alerts: Combine facial recognition with data logging to track who enters and when. You can even set up alerts for unknown faces or access attempts outside allowed hours, for example by using the Twilio SMS API.
- Multi-Factor Triggers: In addition to requiring face recognition and motion detection, include a time-based condition to unlock the door for extra security.
- Fallback Access Methods: Configure a secondary unlock method (like a fob or code) in case facial recognition fails.
In addition to the project ideas mentioned above, consider other ways to continue your journey with Viam.
- Explore other relevant modules in the Viam registry, such as object detection or speech input.
- Learn how to create your own module if you want to extend functionality, like integrating face model training directly on the device or adding support for new hardware.
Real-World Applications of Face-Based Access Systems
Facial recognition access control isn't just a fun Raspberry Pi project. It's used in serious applications, including:
- Smart Home Security: Replace keys and codes with face-based entry, logging who comes and goes.
- Office Access Control: Manage entry for employees and guests without the need for keycards or badges.
- Delivery Drop Zones: Authorize specific delivery personnel to open secure drop boxes.
- Event or Venue Access: Grant entry to VIPs or staff at concerts, conferences, or private events using facial recognition.