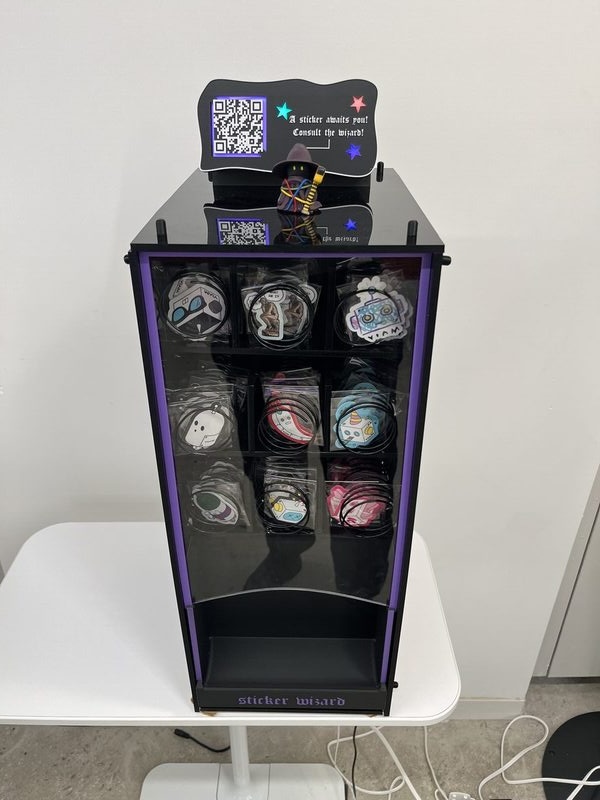
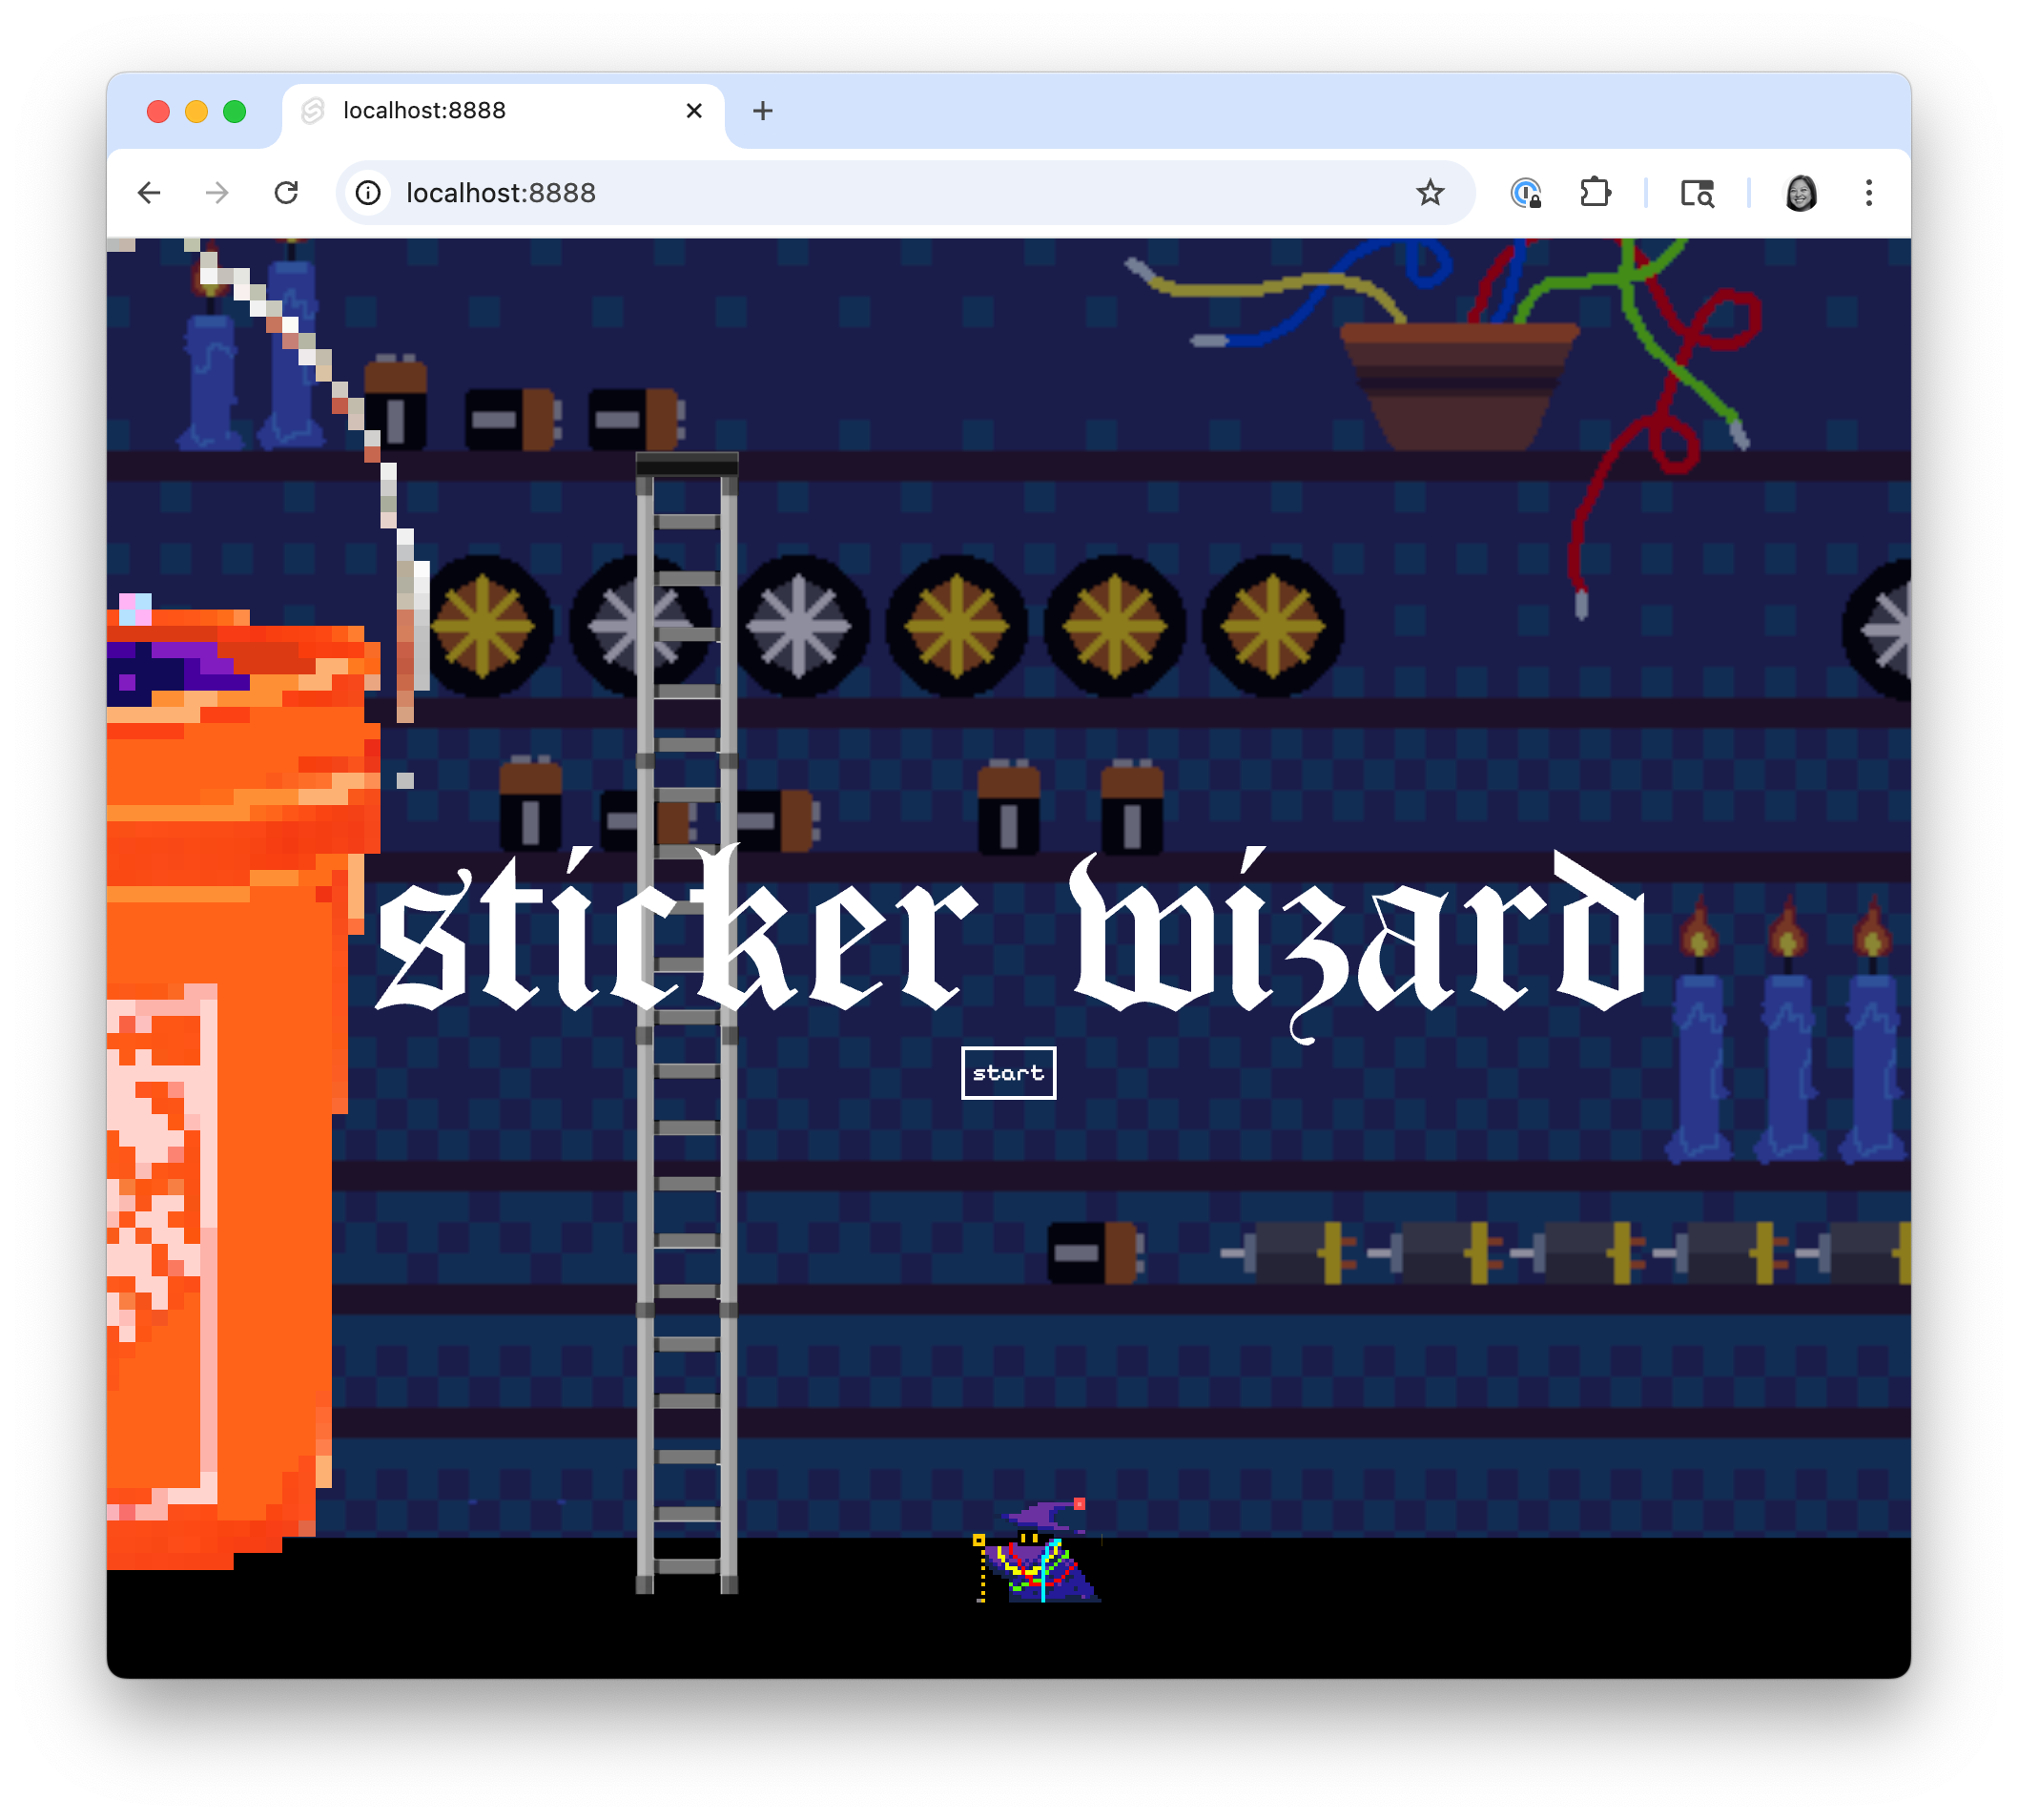
Sticker wizard is a sticker vending machine with a twist: you don't get to choose which sticker you get. Instead, you'll scan the QR code, take the "which robot are you?" personality quiz, and then receive the sticker you deserve (along with a free personality analysis).
This tutorial will walk you through making your own vending machine from scratch, along with a web application that allows you to operate your machine from any device.
Prerequisites
- Sign up for a free Viam account, and then sign in.
- Hardware and supplies requirements
- Raspberry Pi
- Follow the Raspberry Pi setup guide to make sure your Pi is flashed with a Viam-compatible operating system, and that you are able to SSH into it.
- x3 packs of craft wire
- x9 360° micro servo motors (we used MG90S)
- x1 16 channel 12-Bit PWM servo motor driver (PCA9685)
- x2 5V power supply
- Something to build the vending machine with (we used black acrylic sheets, screws, and mounting brackets)
- Raspberry Pi
- Software
- Install the Typescript SDK on your computer.
What You'll Learn
- How to build a custom web interface to control a machine (hint: use the Viam Typescript SDK!)
- How to use servo motors and a motor driver with Viam
- Your robot personality type 😈
What You'll Need
- A computer running Mac, Windows, or Linux
- Your preferred code editor
- A smartphone, for testing!
- Tools
- A computer
- Screwdriver
- Wire cutter
- Tools to construct the vending machine frame (we used a laser cutter and 3D printer)
What You'll Build
- A vending machine controlled by a custom web application
Set up your Raspberry Pi
Follow the Viam documentation to complete the following steps to set up your Raspberry Pi.
- Install Raspberry Pi OS.
- Connect to your Pi with SSH.
- Enable communication protocols with
sudo raspi-config. You will need to enable I2C for the motor driver.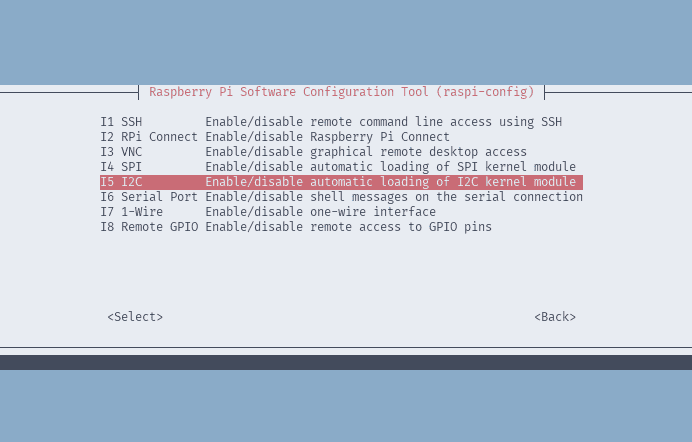
- Restart your Pi to apply the changes with
sudo reboot.
Set up the dispensing mechanisms
- Wind up your craft wire into 9 coils of equal size
- Our coils are about 20 loops long and have a diameter just under 2". We recommend using a PVC pipe or otherwise cylindrical object as a guide!
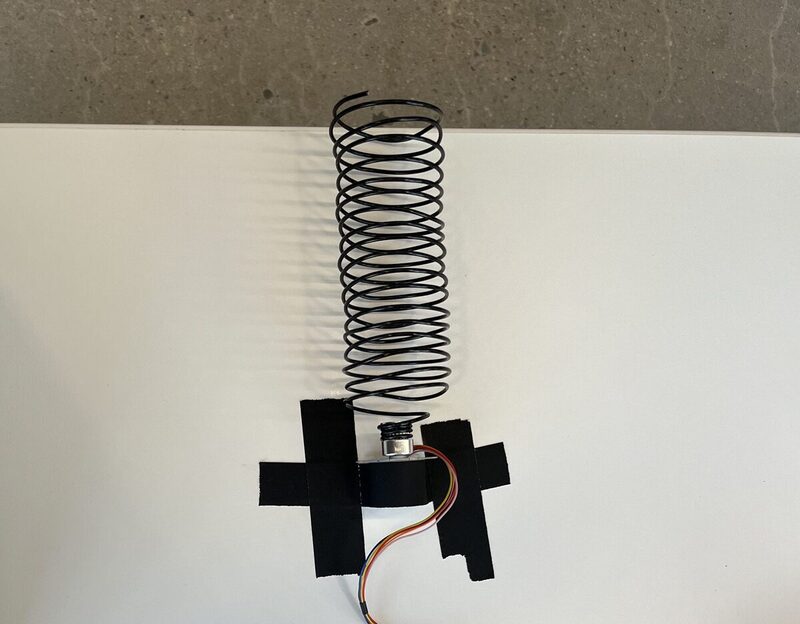
- Attach the coils to the motors
- We simply wrapped the wire around the double servo arms that come with the motors.
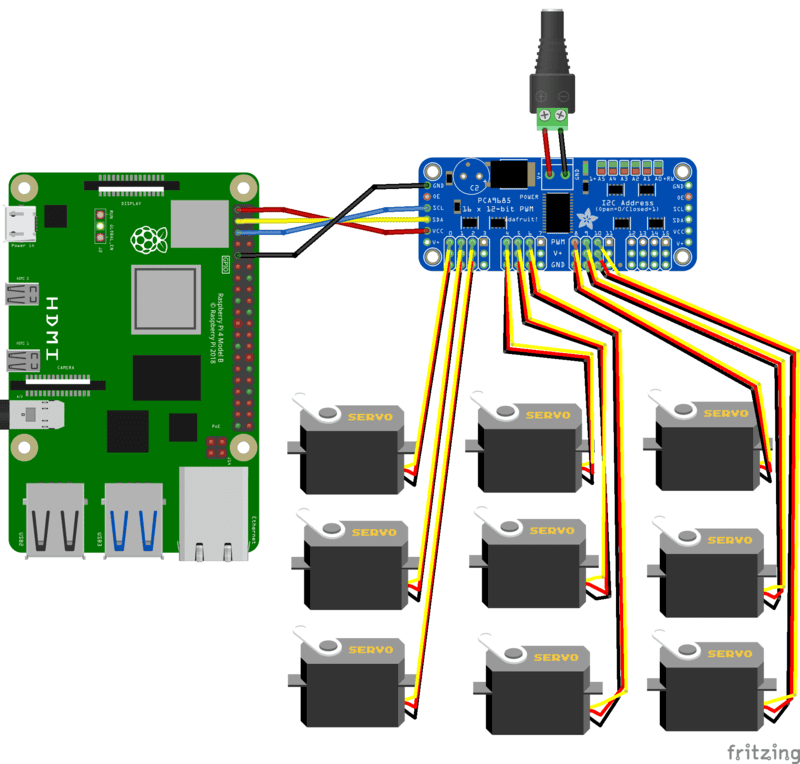
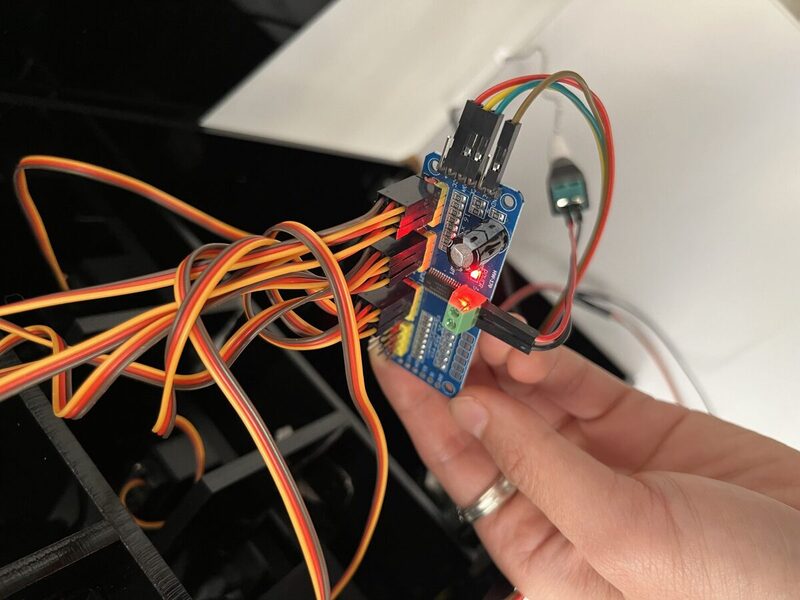
- Wire up the motors to the motor board
- Wire up the motor board to a 5V power supply
- Wire up the motor board to your Raspberry Pi
- Follow these instructions and refer to the wiring diagram above.
Configure a new machine
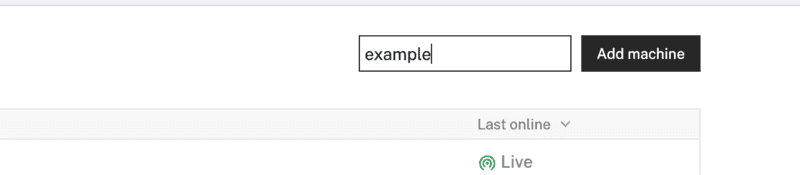
- In the Viam app under the LOCATIONS tab, create a machine by typing in a name and clicking Add machine.
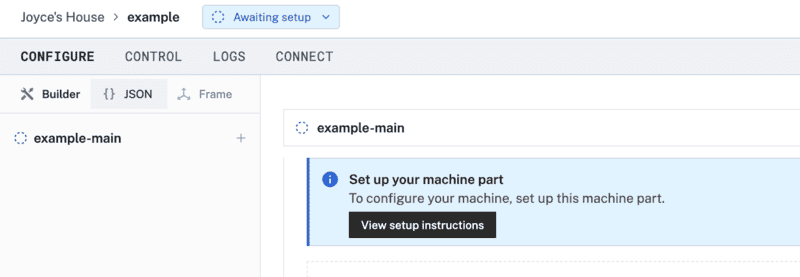
- Click View setup instructions.
- To install
viam-serveron the Raspberry Pi device that you want to use to communicate with and control your webcam, select theLinux / Aarch64platform for the Raspberry Pi, and leave your installation method asviam-agent.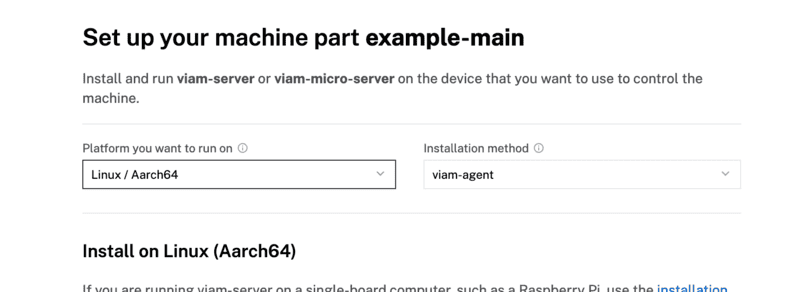
- Use the
viam-agentto download and installviam-serveron your Raspberry Pi. Follow the instructions to run the command provided in the setup instructions from the SSH prompt of your Raspberry Pi.
- The setup page will indicate when the machine is successfully connected.

Add your board and peripherals
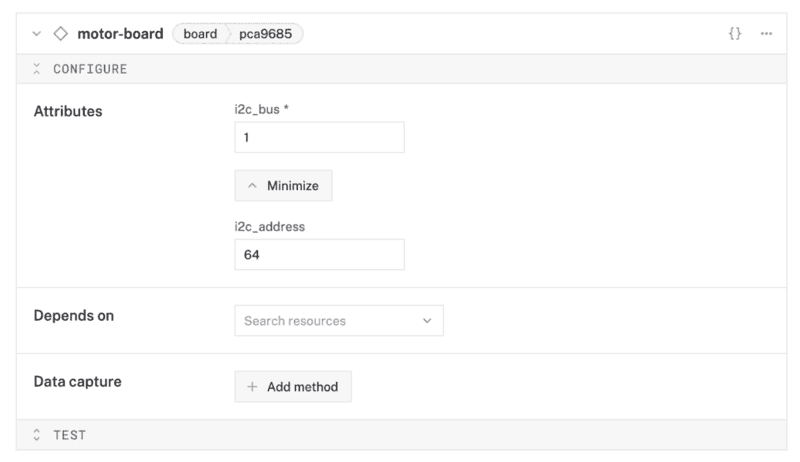
- In the Viam app, find the CONFIGURE tab. It's time to configure your hardware.
- Click the + icon in the left-hand menu and select Component.
- Select
board, and find thepca:pca9685module. Give this component a namemotor-board. This adds the module for working with a PCA9685 board that displays in the left sidebar. Notice adding this component also adds a corresponding panel on the right. - From the Attributes section of the panel, configure the
i2c_busto1. - Configure the
i2c_addressas64(0x40), the default base address for PCA9685.
Test the machine
From here, you should be able to use Viam to control your motors! To test:
- Open the TEST section of the board component
- Set the pin to be the pin on the board that you connected your motor to
- Set the PWM frequency to whatever your motor specifies
- The MG90S motors use a PWM frequency of 50 hz
- (Experimentally) Set the PWM duty cycle
- Different duty cycles determine the speed and direction of your motor. Due to inconsistencies between motors, it may take some experimentation to find the desired duty cycle
- Our duty cycles ended up being either 0.075 or 0.09, or 7.5% and 9% (opposite directions)
If you cannot find the board, run i2cdetect -y 1 on your Raspberry Pi to check if your board is connected correctly.
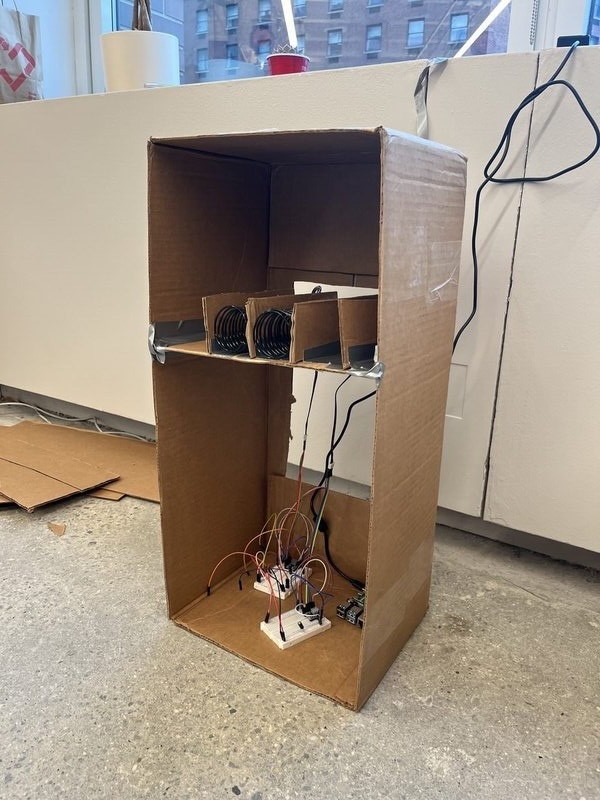
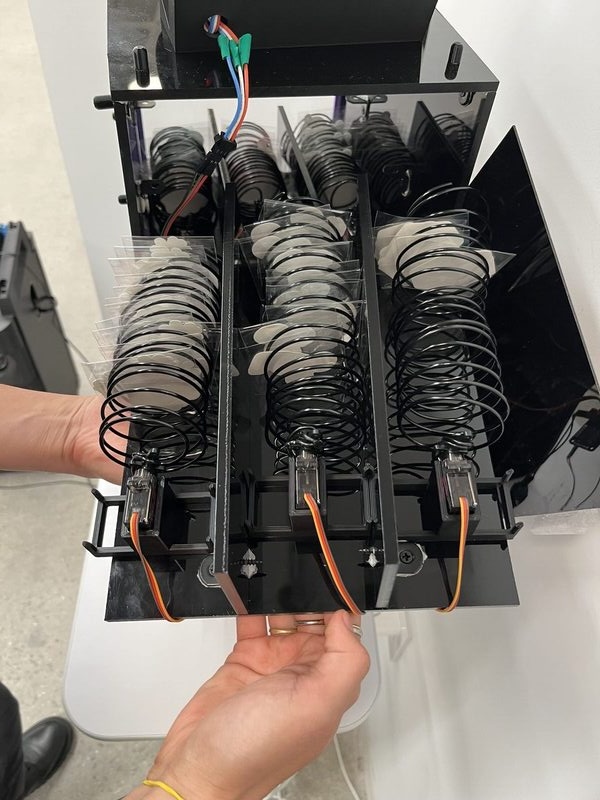
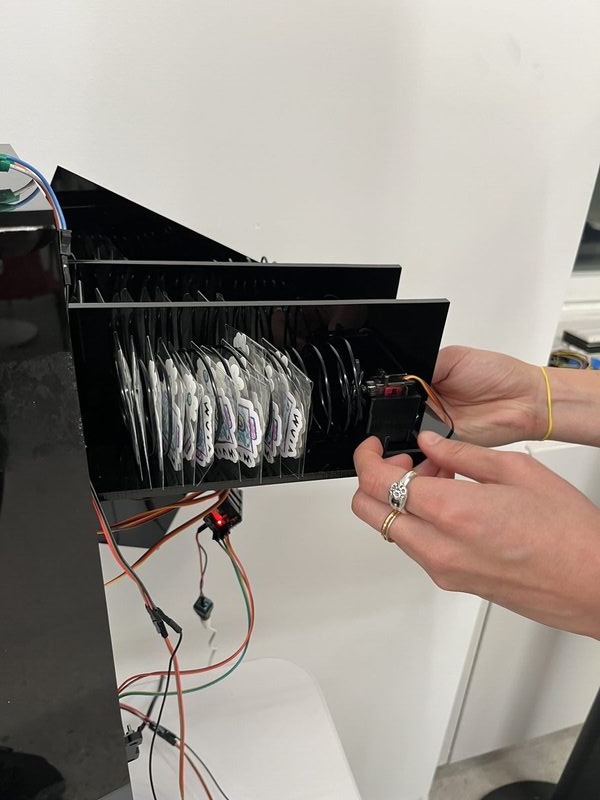
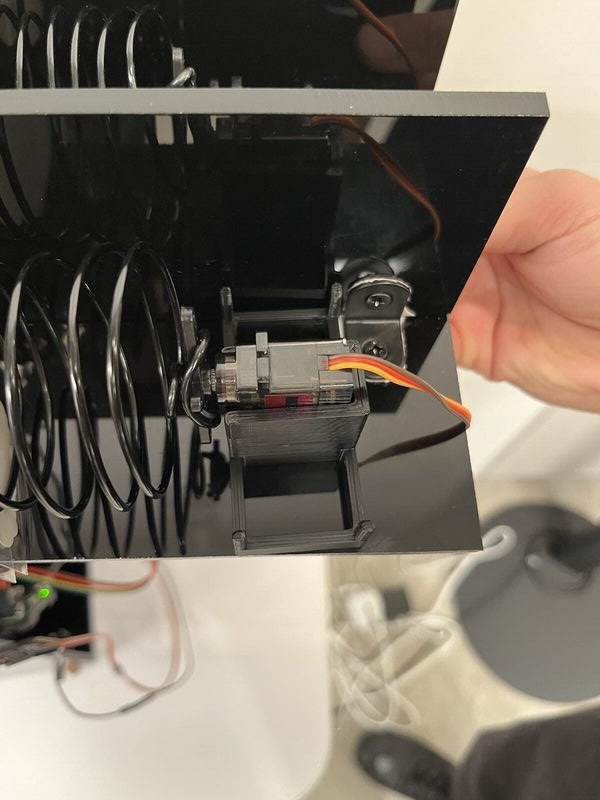
The basic structure of the vending machine is a box with 3 "drawers" of 3 motors each. We prototyped using cardboard, and then made the final structure with acrylic cut to size and screws. We made each layer of motors a drawer for convenient refilling and maintenance. To fit the motors in the drawers, we created dividers between each motor and coil, and 3D printed a motor mount that sits on the drawer.
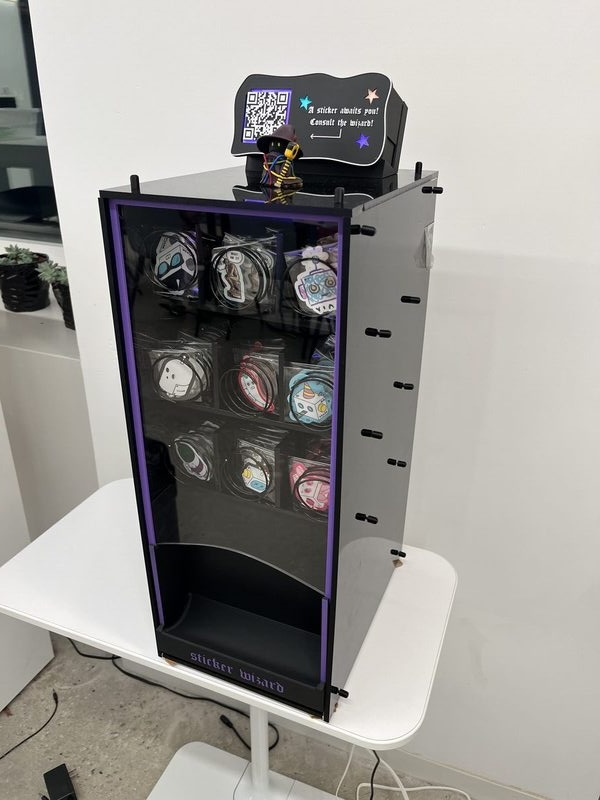
But your structure can be anything! You could build this out of cardboard and tape! As long as it can contain the motors and dispenses the stickers...you're golden!
Cardboard prototype
In progress...
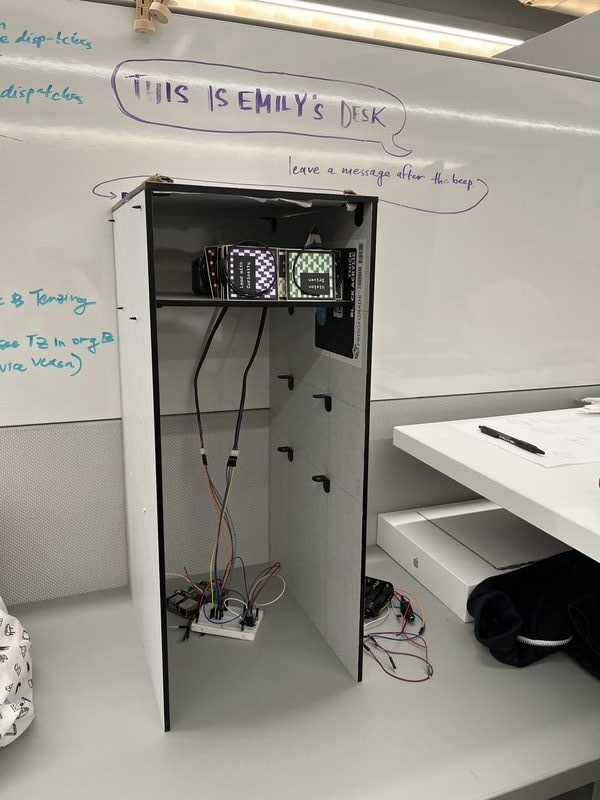
Motor "drawer"
3D-printed motor mount
This part is entirely up to your imagination, you can build any interface you want, using any technology you want! The only requirement is to use Viam's Typescript SDK to interface between your web application and your machine.

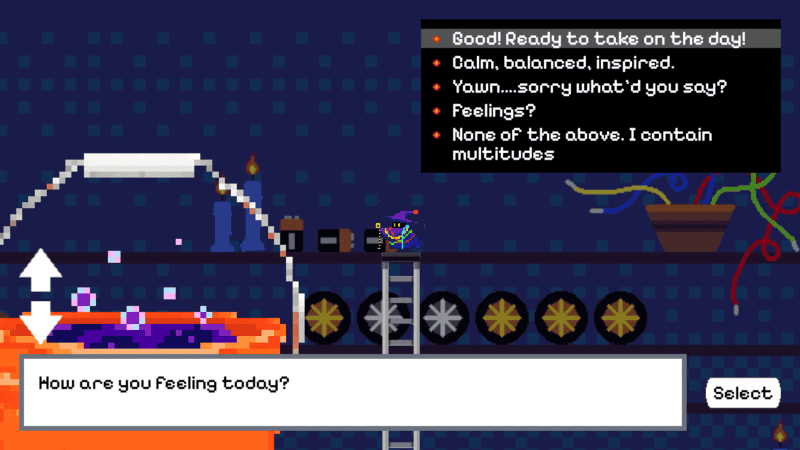
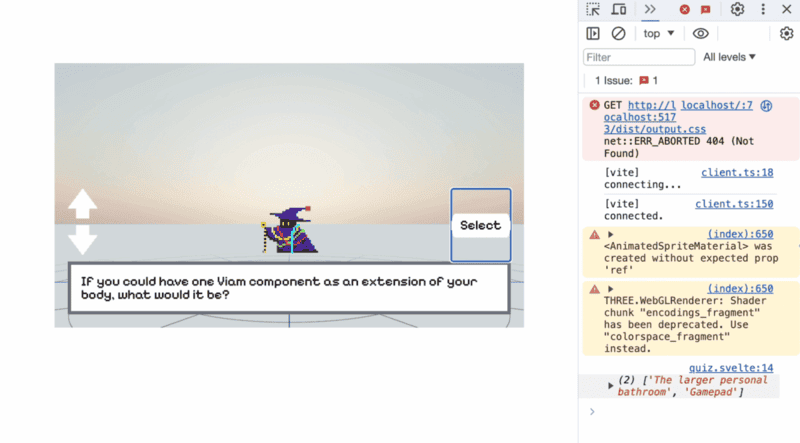
We built our web application with SvelteKit and Threlte. We used Aseprite-created pixel art assets with the Threlte component to create the animations. Our web app has the following basic components:
- Intro sequence
- Quiz (Display questions, accept responses)
- Results view (with dispense sticker button)
To authenticate your website with your machine, use Viam API keys. We recommend setting up an operator API key so users don't have write access to your machine (and use a .env file to avoid committing your API keys to your Github repo!)
Here's our source code.
We can host our web server directly on the Raspberry Pi using a module. For now, we've incorporated our web app and the web server into the same module.
- In the Viam app, find the CONFIGURE tab. Click the + icon in the left-hand menu and select Component or service.
- Search for
sticker-wizard:webapp, then select it.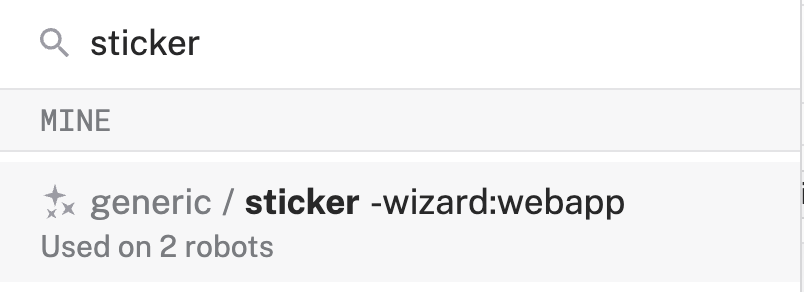
- Give this module a more descriptive name, for example
sticker-wizard-app. Click Create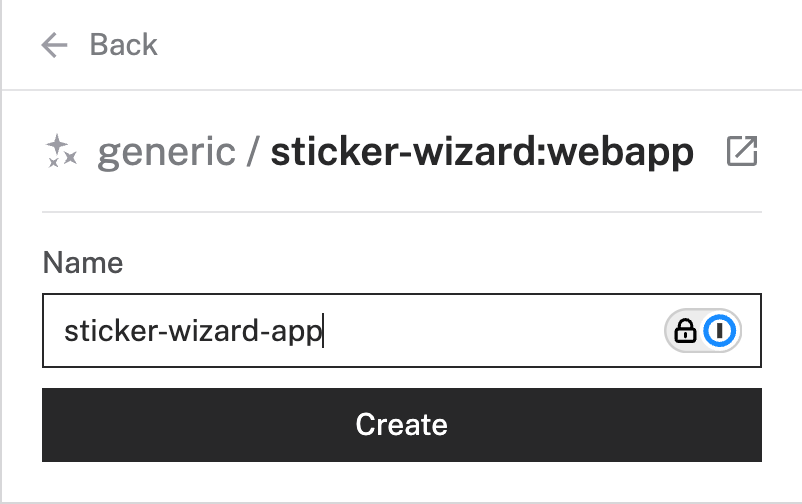
- Notice that this adds two cards, one for the module information and one to configure the module itself. If you'd like, you can configure a different port for to access the web app. Otherwise, if the config is left empty, the default port of
8888will be used.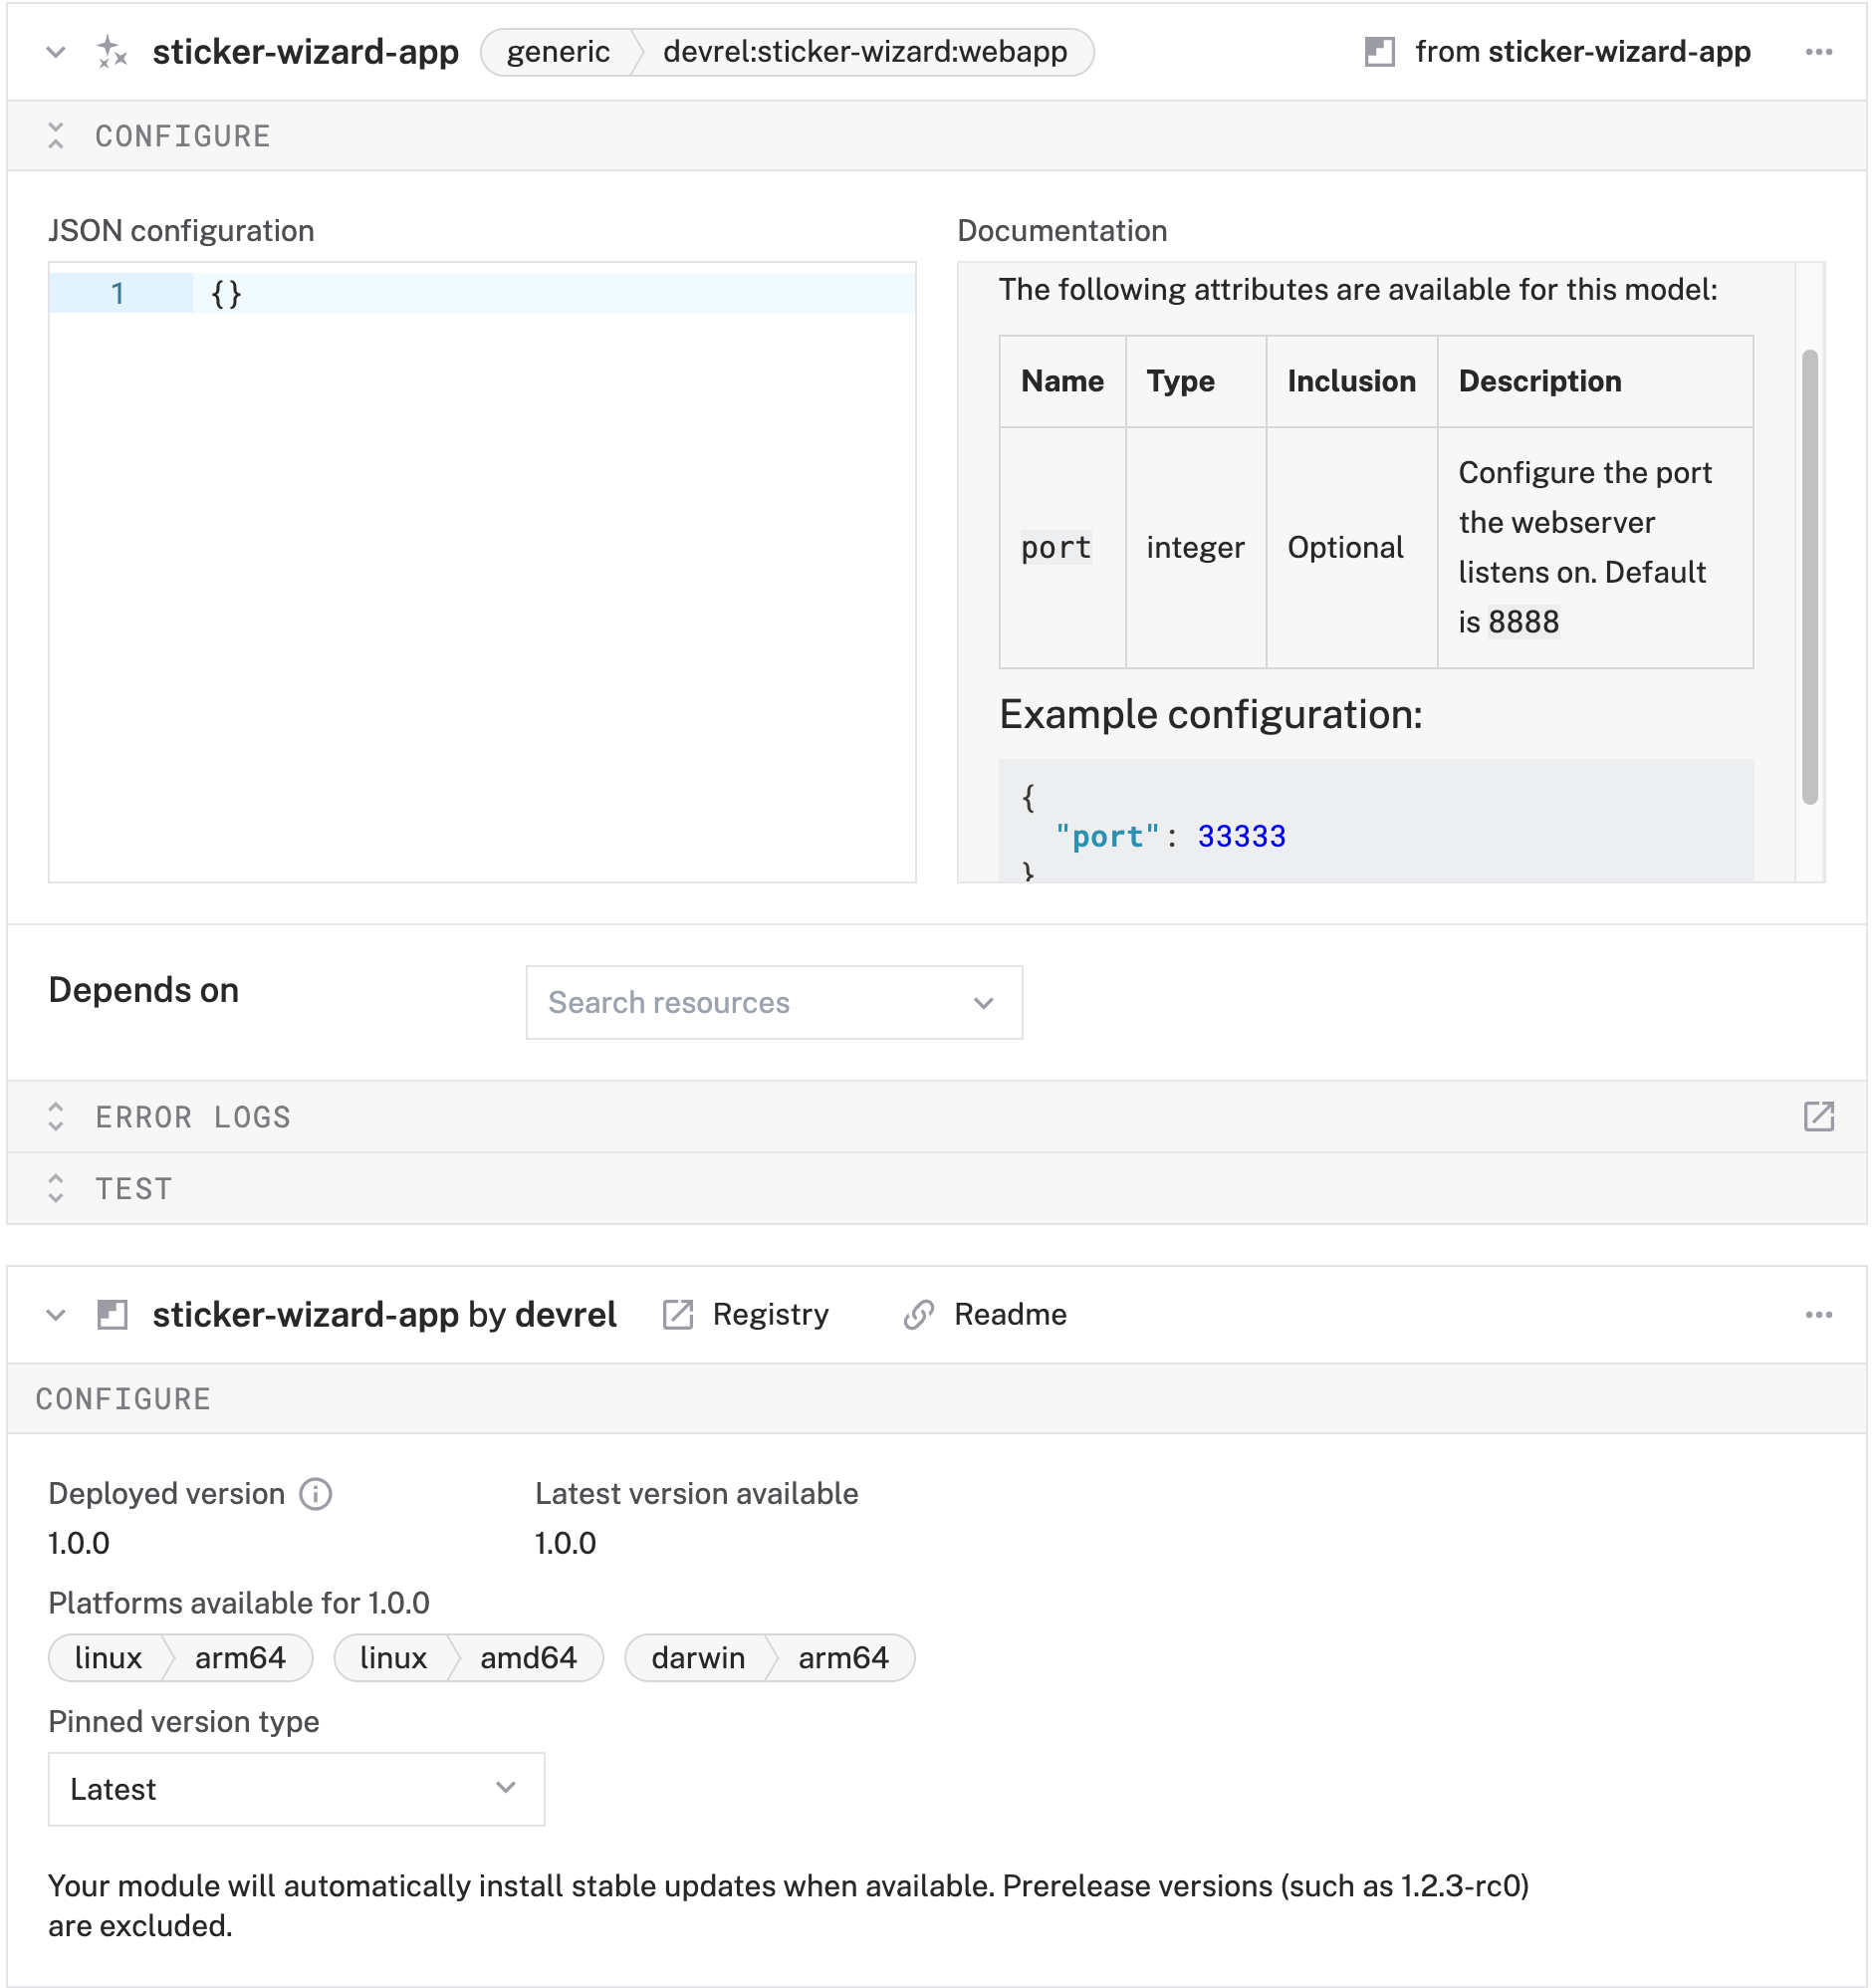
- Click Save. Verify that you can access the web app on your local network (default port is :8888 unless you configured a different one in the web app configuration).
That's it! We added a few finishing touches to enhance the experience, but these are completely optional.
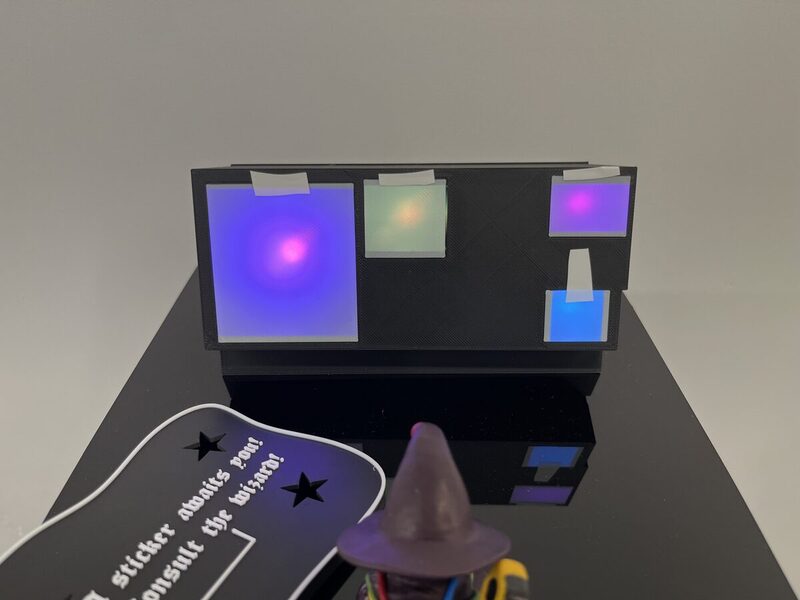
LEDs
The LEDs really enliven this project, and let people know that sticker wizard is alive and ready to gift you a sticker! These instructions are for WS2811 LEDs, the LEDs we used here, but any individually-addressible LEDs should do the trick.
- Connect some WS2811 LEDs to a SPI pin of the Raspberry Pi
- If using a Raspberry Pi 5, write a script using neopixel_spi to control the colors of your LEDs. Otherwise, use rpi_ws281x
- Encase your LEDs in a pretty display!
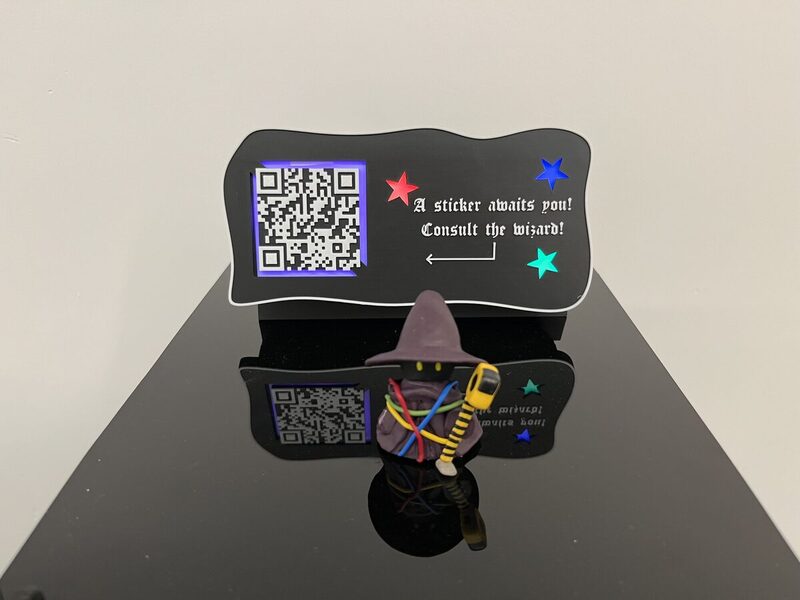
QR code
Use any QR code generator to create a QR code that encodes your web app's URL, and display it somewhere on your machine! We used qr-code-generator.com, but any generator should work.
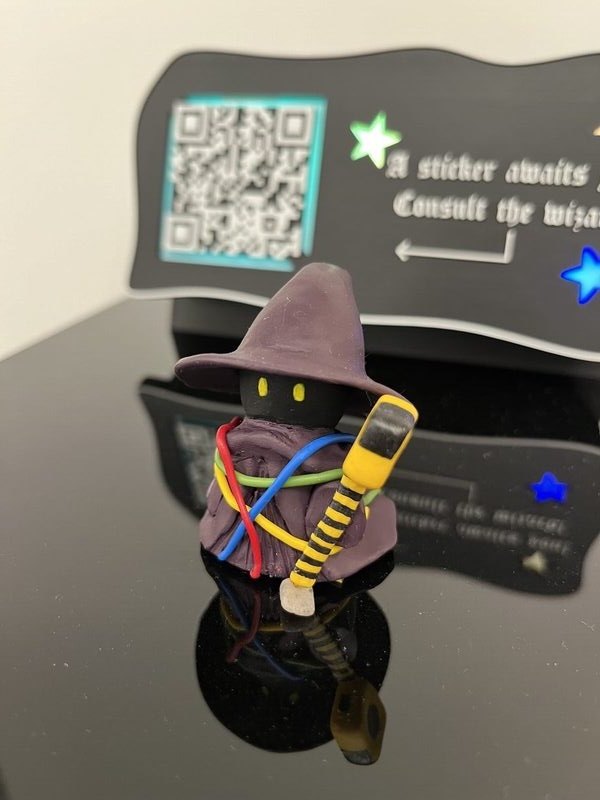
Clay figurine
Personify your machine! This dude was hand-sculpted with polymer clay.
Explore the Viam platform and browse components and services to build your next project.
Related projects
- Automatic pet feeder
- Tipsy: Create an autonomous drink carrying robot
- Robotic claw game using a motion service, which could be extended in the following ways:
- Using object or color detection to keep track of how many people grab different kinds of prizes
- Using an ML model to determine grab success rate and create a score counter