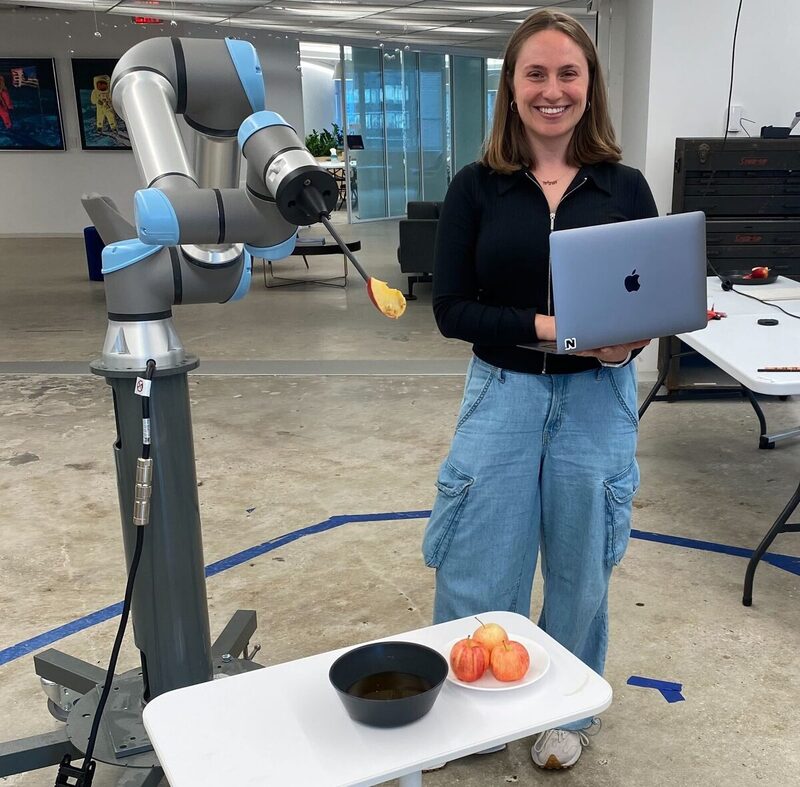
Dipping apples in honey is a Jewish tradition on Rosh Hashanah, the Jewish new year, to symbolize a sweet new year. In this tutorial, you will program a robotic arm to dip apples in honey - no more sticky hands!
Watch the Instagram post to see a working demonstration.
Prerequisites
- Sign up for a free Viam account, and then sign in.
- Install the Viam Python SDK on your computer.
What You'll Learn
- How to interact with a robotic arm component
- How to verify the state and positioning of an arm
- How to issue movement commands to your robotic arm
What You'll Need
- A computer running Mac, Windows, or Linux
- VS Code installed, or your preferred code editor
- Python3 installed
- Access to a robotic arm
- If you do not have a robotic arm of your own, Viam provides a fake arm component to set up a virtual robotic arm with the same kinematic model as a real robotic arm.
What You'll Build
- A program for a robot arm to dip apples in honey
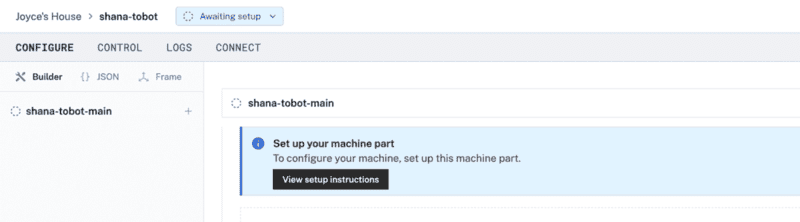
Add a new Viam machine
- In the Viam app under the LOCATIONS tab, create a machine by typing in a name and clicking Add machine.

- Click View setup instructions.
- Install
viam-serveron the device that you want to use to communicate with and control your robot arm. For example, select theMacplatform if you want to use your Mac computer to control the arm. If you're using a different computer, select the platform appropriate for your setup.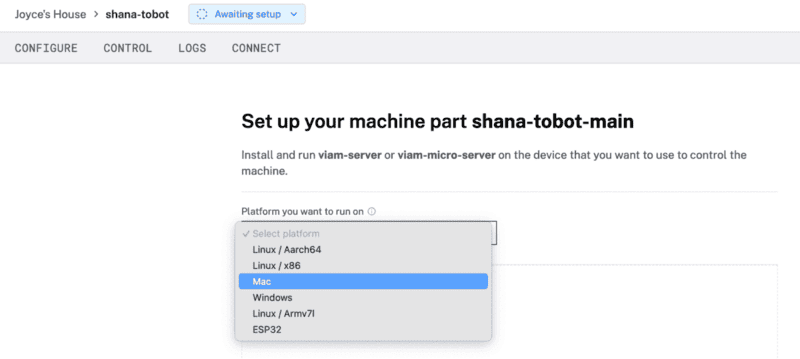
- Following the rest of the installation instructions on the setup page, install
viam-serveron your computer by entering the provided CLI command into your terminal prompt. The example shown here is on a Mac.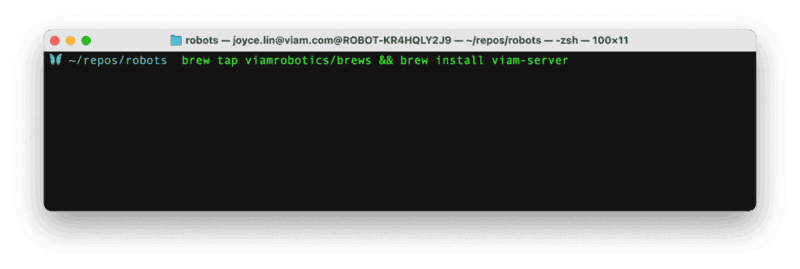
- Download the machine cloud credentials file to your computer for
viam-serverto connect toapp.viam.com. - Run
viam-serverlocally on your computer with the config you just downloaded. If your download in the previous step went to a different folder, modify the file path.viam-server -config ~/Downloads/viam-shana-tobot-main.json - The setup page will indicate when the machine is successfully connected.

Configure your machine
Now that our machine is live, let's configure an arm component.
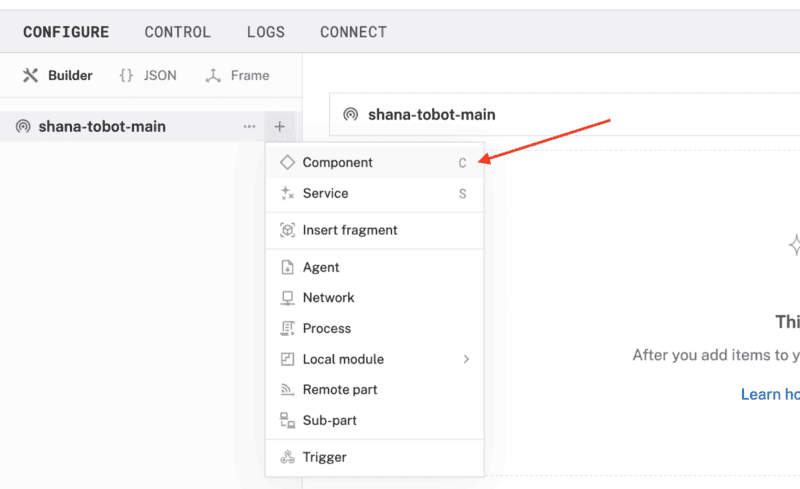
- Under the CONFIGURE tab for your live machine, click on the + symbol next to your machine in the left sidebar and select Component in the menu that opens.
- Choose arm as the type, and then choose your desired model. For example, if you're using a UR5e, choose the
ur5emodel from the list.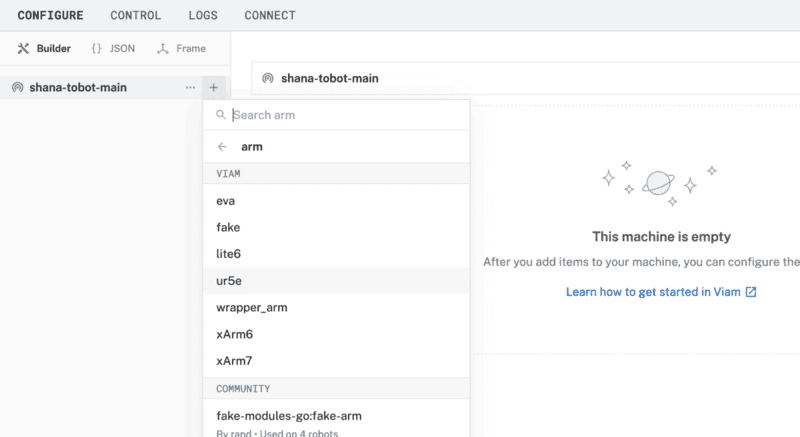
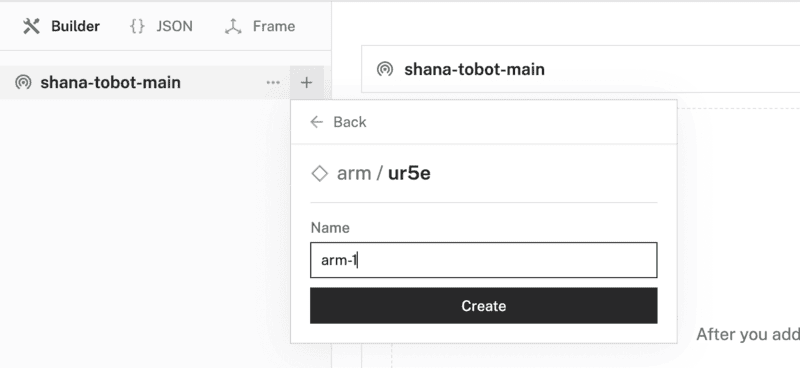
- Leave the default name, and then click Create.
- In the newly created component panel, configure any attributes as needed. Refer to the documentation for the model for information about your arm's model. In the example shown here, we are using a
ur5earm model, inputting a requiredhostfield with the arm's IP address, and moving at a speed of20degrees per second.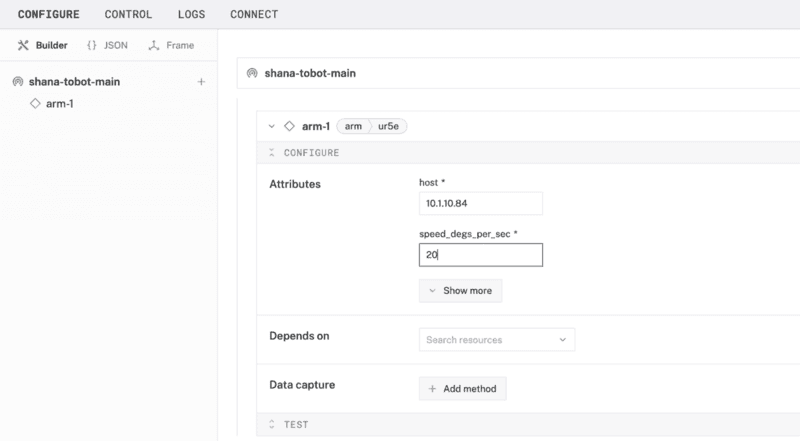
- Save your machine's configuration.
Control your machine from the Viam app
- Under the CONTROL tab of your live machine, find the corresponding panel for your configured arm.
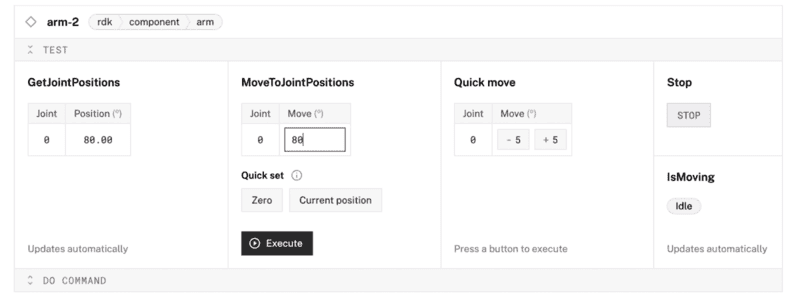
- Experiment with getting joint positions to fetch data about the robotic arm's current position, and moving joint positions.
Control your machine with code
Now that you know how to work with your robotic arm using the Viam app, learn how to program your arm using code.
- Under the CONNECT tab of your live machine, select the Python SDK we'll use to access the arm. Follow the instructions to install the Python SDK if you haven't already.
mkdir shana-tobot && cd shana-tobot python3 -m venv .venv source .venv/bin/activate pip3 install viam-sdk - Toggle on
Include API keyto see your machine credentials in the boilerplate code below. Make a note of yourAPI-KEY,API-KEY-ID, andMACHINE-ADDRESS-URIfor the next steps.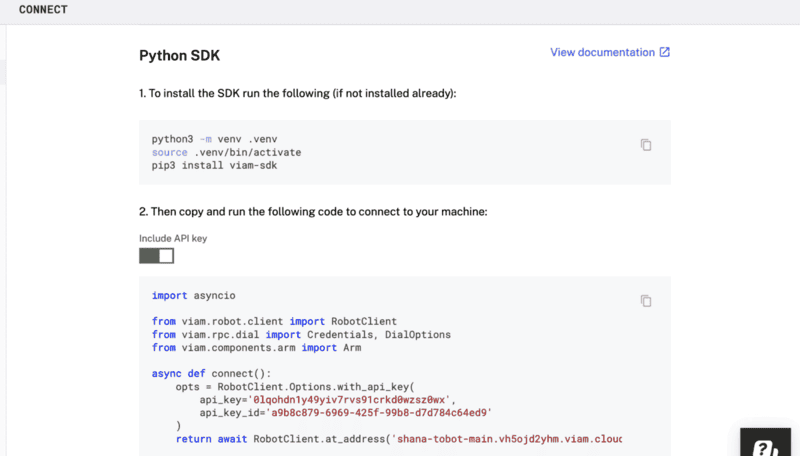
- From the command line of your terminal window, create a new file to contain your script.
touch script.py - To program the movement of the robotic arm, copy and paste the following Python code into
script.pyusing your preferred code editor. Be sure to replace the placeholders for<API-KEY>,<API-KEY-ID>, and<MACHINE-ADDRESS-URI>with your own machine credentials from the previous steps.import asyncio from viam.robot.client import RobotClient from viam.components.arm import Arm from viam.proto.component.arm import JointPositions from viam.proto.common import Pose async def connect(): opts = RobotClient.Options.with_api_key( api_key='<API-KEY>', api_key_id='<API-KEY-ID>' ) return await RobotClient.at_address('<MACHINE-ADDRESS-URI>', opts) async def main(): machine = await connect() print('Resources:') print(machine.resource_names) # move arm to exact end position then get coordinates: # arm arm = Arm.from_robot(machine, "arm-1") arm_return_value = await arm.get_end_position() print(f"arm get_end_position return value: {arm_return_value}") # hard coded end position - grabbed from terminal output x = -117.89177530820058 y = 810.53648219876914 z = -86.077008874770044 o_x = -0.15705296827522847 o_y = 0.24567021047557136 o_z = -0.95654613732994043 cmd_arm_pose = Pose(x=x, y=y, z=z, o_x=o_x, o_y=o_y, o_z=o_z) #Move to bowl await arm.move_to_position(pose=cmd_arm_pose) #adjust to go a little deeper into the honey my_arm_joint_positions = await arm.get_joint_positions() newJointPos = JointPositions( values=[ my_arm_joint_positions.values[0], my_arm_joint_positions.values[1] + 6, my_arm_joint_positions.values[2], my_arm_joint_positions.values[3], my_arm_joint_positions.values[4], my_arm_joint_positions.values[5], ] ) print("dipped") await asyncio.sleep(2) #what are current joints? my_arm_joint_positions = await arm.get_joint_positions() print(f"myArm get_joint_positions return value: {my_arm_joint_positions}") #lift joint 1 and joint 3, drop joint 2 newJointPos = JointPositions( values=[ my_arm_joint_positions.values[0], my_arm_joint_positions.values[1] - 40, my_arm_joint_positions.values[2] + 25, my_arm_joint_positions.values[3] - 30, my_arm_joint_positions.values[4], my_arm_joint_positions.values[5], ] ) #move await arm.move_to_joint_positions(positions=newJointPos) print("lifted") # Don't forget to close the machine when you're done! await machine.close() if __name__ == '__main__': asyncio.run(main()) - Save your changes, and then run the script from your command line.
python3 script.py
Customize the robotic arm
In addition to continuing to refine the code, you can also refine the robotic arm. In our example, to dip a sliced apple in a bowl of honey, it was helpful to repurpose the gripper by adding a skewer (in this case a chopstick). For your own use case, a different utensil with different properties and form might be more helpful.

The Viam arm component library has several methods to simplify accessing and working with robotic arms. Learn how to work with joint positions and poses to quickly adjust one or more elements of position AND orientation simultaneously, by modifying other elements of the original arm pose.
What You Learned
- How to interact with a robotic arm component
- How to verify the state and positioning of an arm
- How to issue movement commands to your robotic arm
Related projects
- Build a menorah lighting robot tutorial
- Plan Motion with an Arm and a Gripper tutorial
- Build a Robotic Claw Game with a Raspberry Pi tutorial